
Lovable + Azure: How to Host Your App for Free
Deploy smarter with GitHub CI/CD and Azure Static Web Apps
Vibe coding is one of the latest trends in AI, aiming to make modern web development approachable to the masses. Starting with a simple prompt, users can create fairly sophisticated websites and apps in a matter of minutes or hours - no coding experience required! One of the more popular vibe coding apps is Lovable. They tout themselves as your “personal AI software engineer”, and frankly, it’s quite good, especially if you yourself are NOT a software engineer!
Often these applications make hosting your newly AI-created website a paid feature or lock you into their domain. If you already use Microsoft Azure, then leveraging their Static Web Apps (SWA) will allow you to host a website for free, making use of Microsoft’s built-in features like global routing, custom domain names, SSL certificates, Docker deployments, and even incorporate API backends using Function Apps. We’ll be using Lovable to create our website, but these hosting steps work for any app, regardless of how it was developed.
This article will assume you already have the following accounts and access:
Using Lovable to Build an App
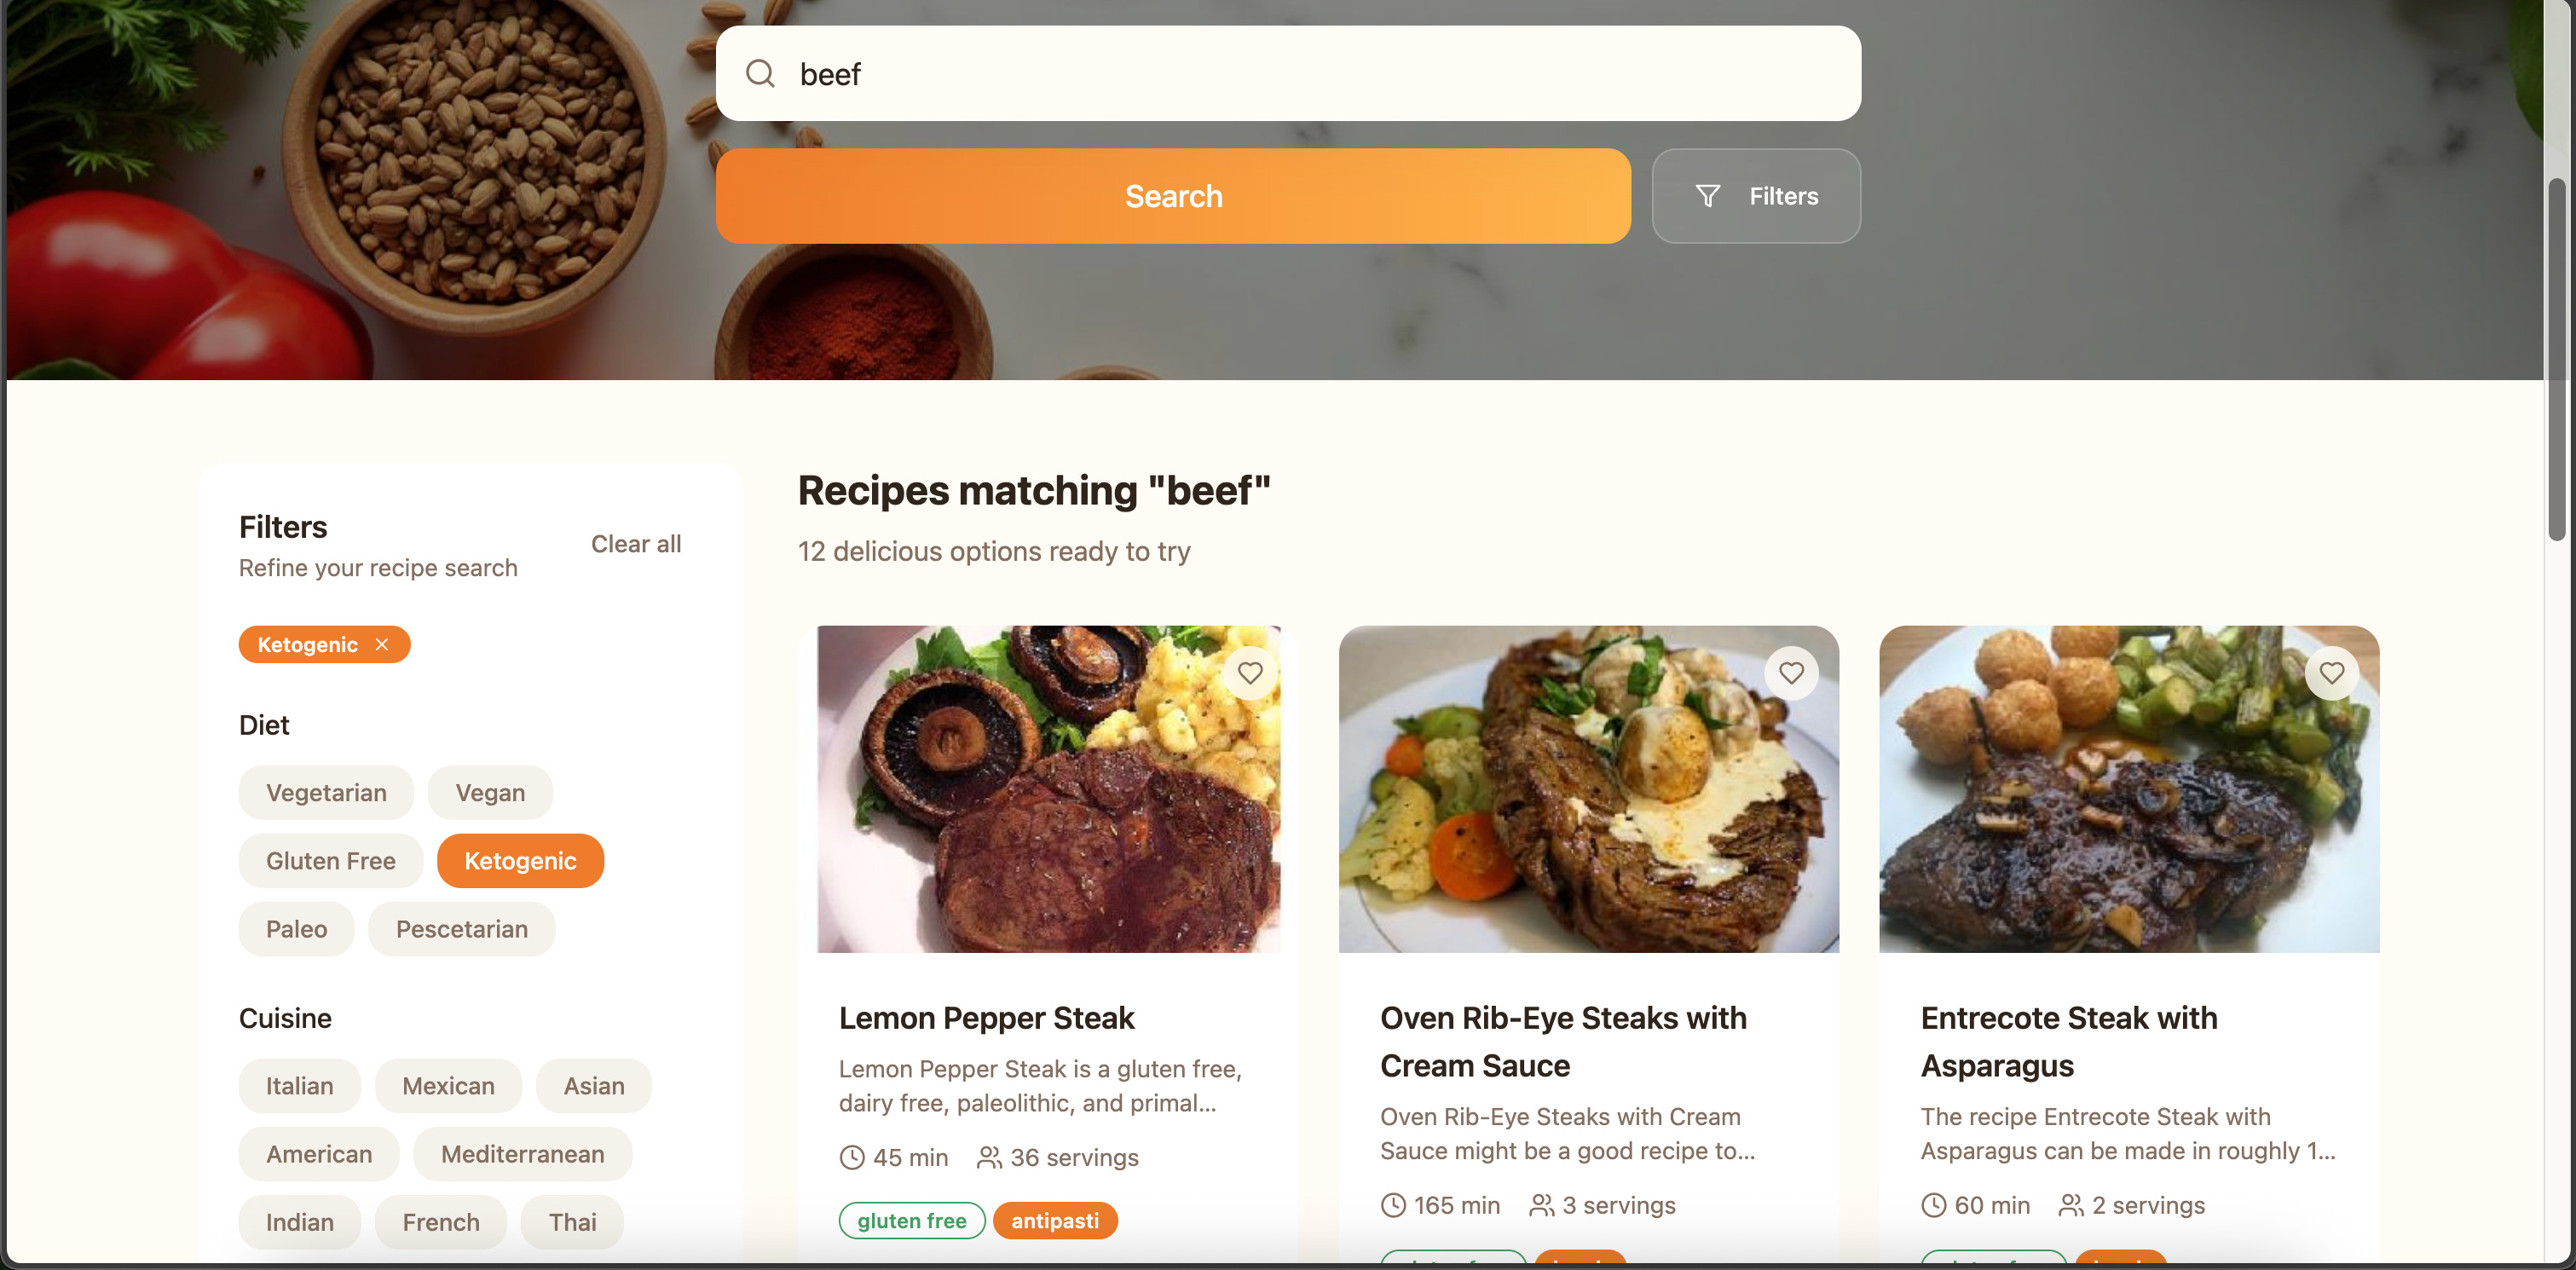
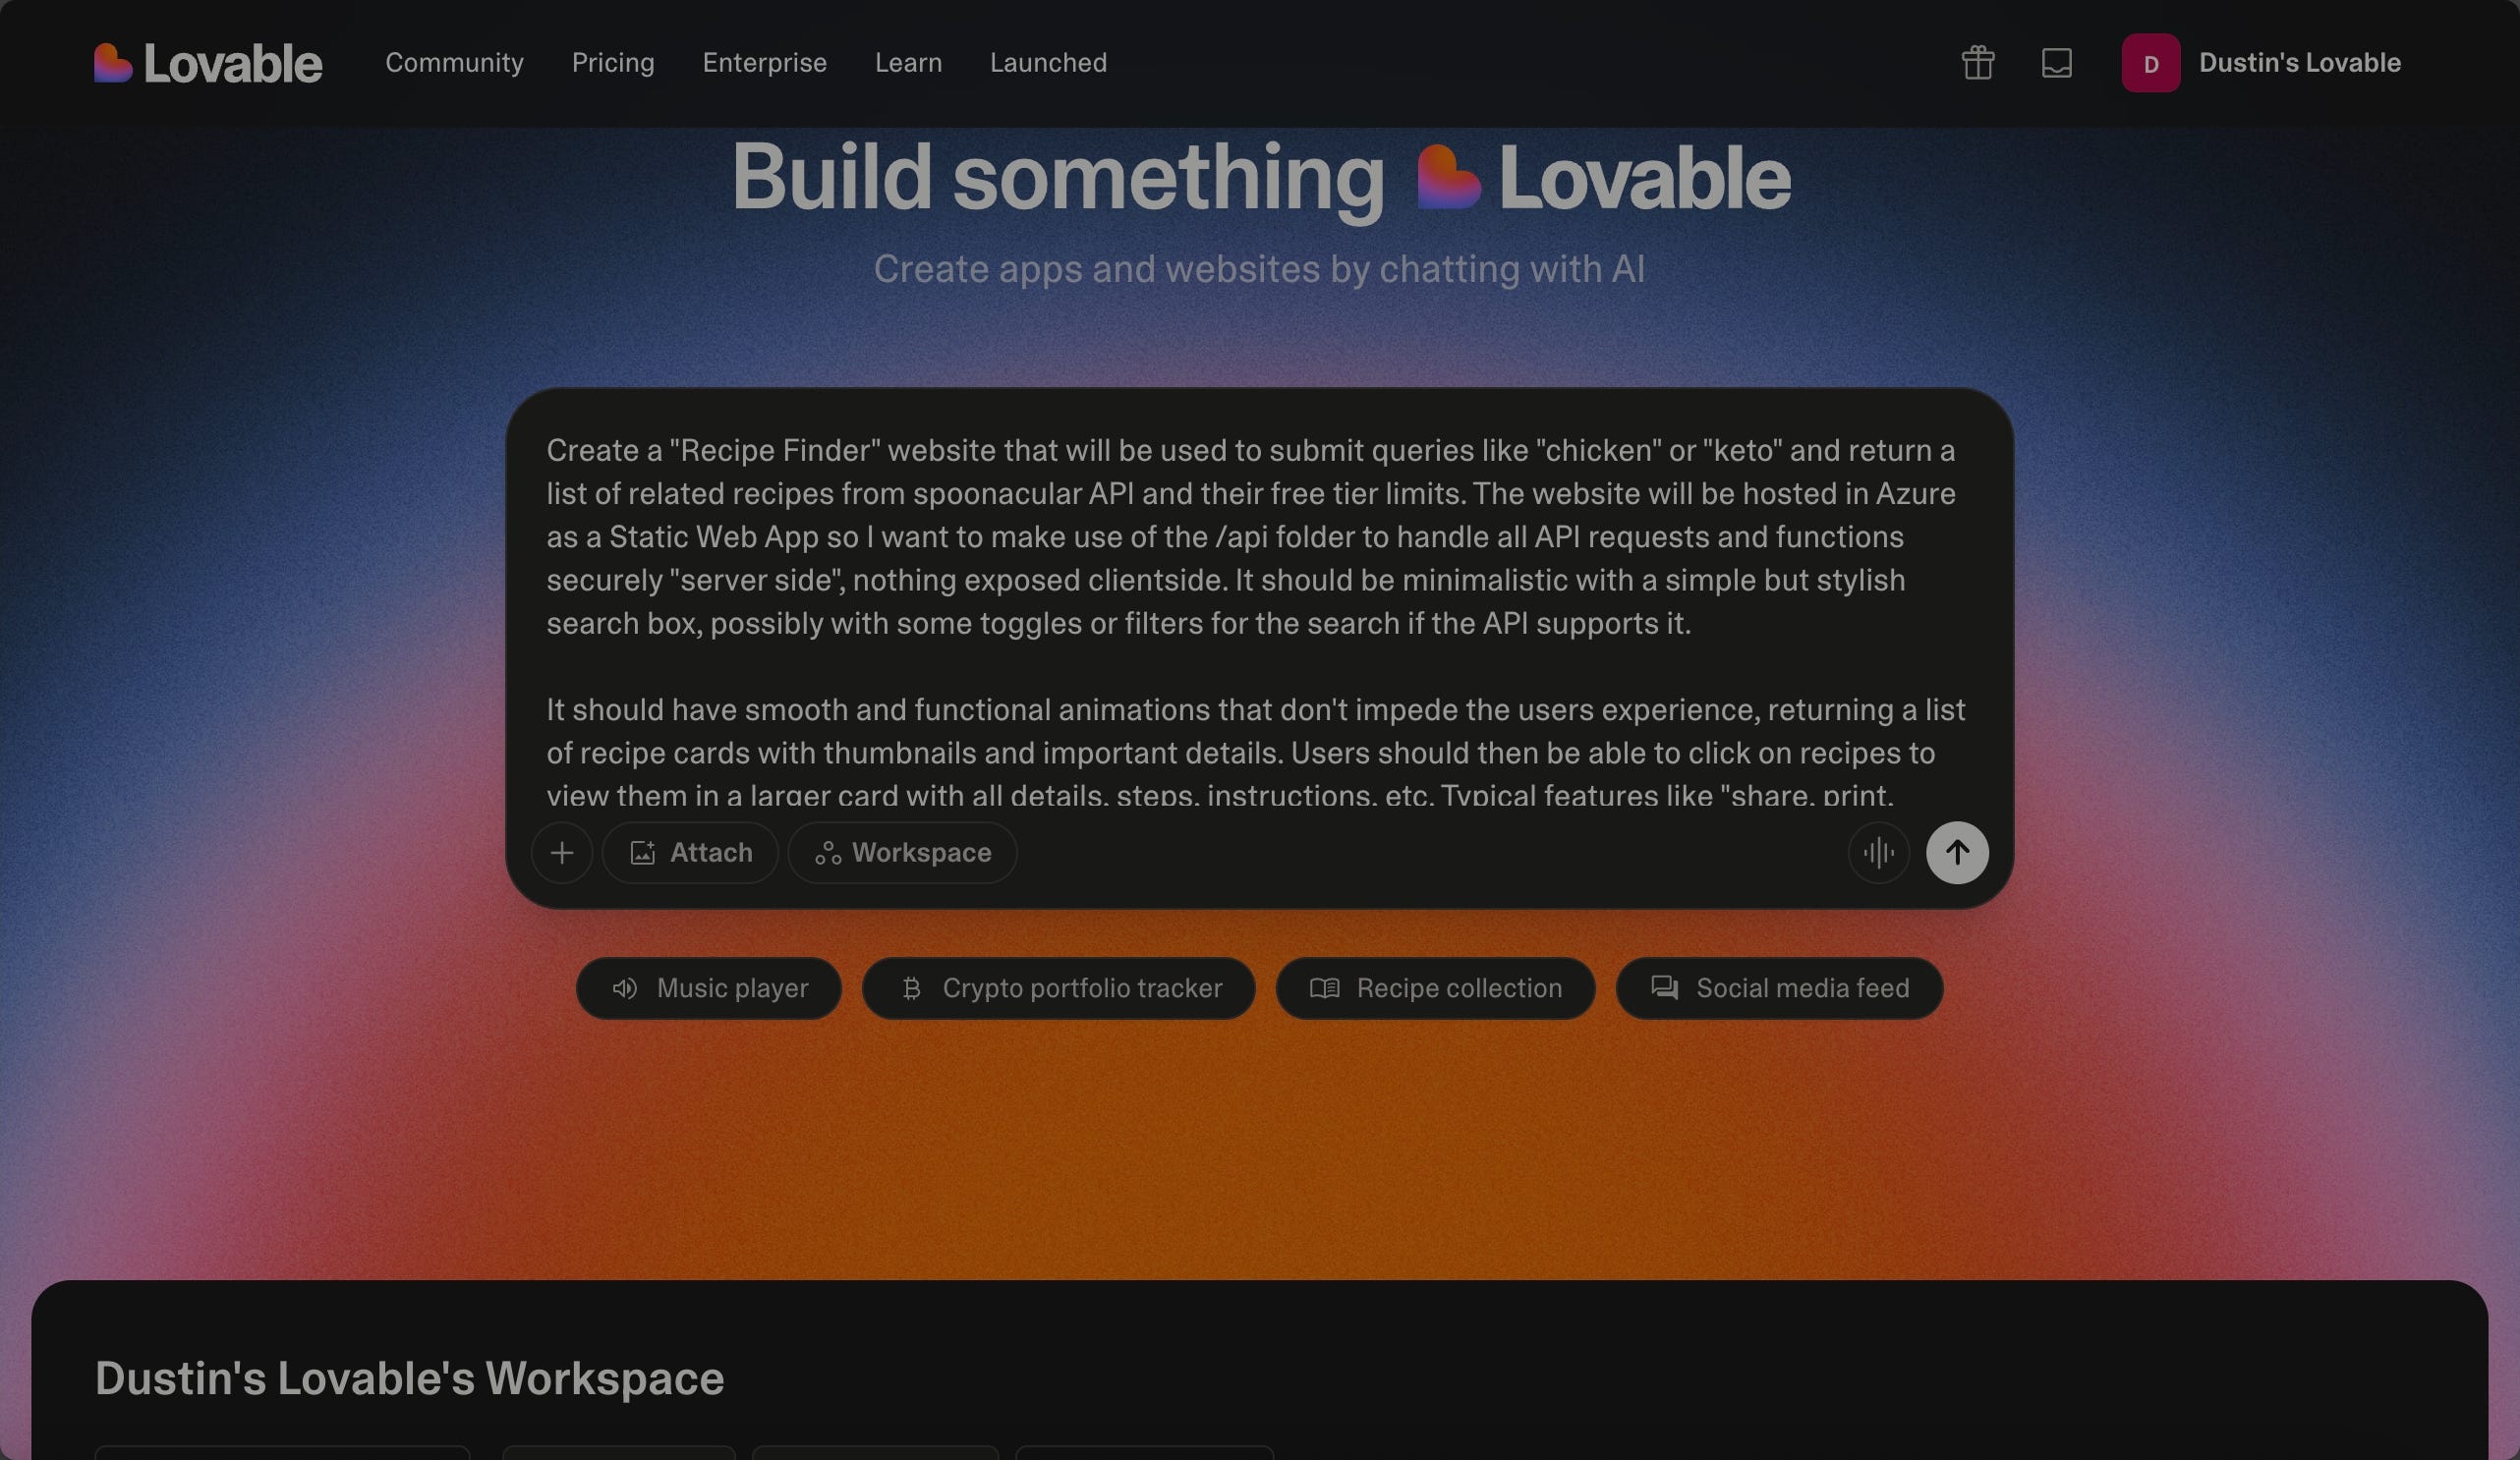
First we need to determine what to build. Keep it simple and focused when beginning, describing the core functions and features of the application in its most basic state - or don’t! Go experiment and see what gives you the best results. Lovable has lots of documentation on what they think works best for creating applications if you aren’t sure where to begin. I’m going to attempt to create a website that searches for recipes using the Spoonacular API with secure server-side routing.
Depending on the complexity of your request you will likely get a mix of results - probably a bit of “wow, this is really cool” mixed with “but this button doesn’t do anything, this one 404s when you click on it, and whose data is this?”. AI is extremely powerful but it’s not a miracle worker just yet - expect some rough patches and frustrations along the way. Be patient, tell it the errors you see on the screen, provide screenshots, explain what you want it to do or how you want it to look, etc.
Typically I’d continue working on the application further and refine it before bothering to host it, however, in the spirit of moving this blog along, let’s jump to the next step - GitHub!
📌 Tip! If you’re creating an app with multiple pages, or routes, then you may need to nudge Lovable a bit. Let it know you’re building an app with Azure and you need to list out your routes.
Syncing Your App to a GitHub Repo
Once you’ve gotten your app to a working state you can begin the process of syncing it to your GitHub account. From Lovable you can find the GitHub integration in settings and configure it with these steps - I’d highly suggest giving Lovable permissions to specific repositories instead of all repositories when asked. Follow the prompts, and your application will be seamlessly transferred. You can follow the links to jump to it and see the app’s codebase.

Deploy Azure Static Web App from GitHub
With our app now in GitHub, we can create our Static Web App (SWA) to deploy from the repo's codebase ensuring it’s always up to date with the latest build.
Navigate to portal.azure.com and search for and select Static Web App from the menu.
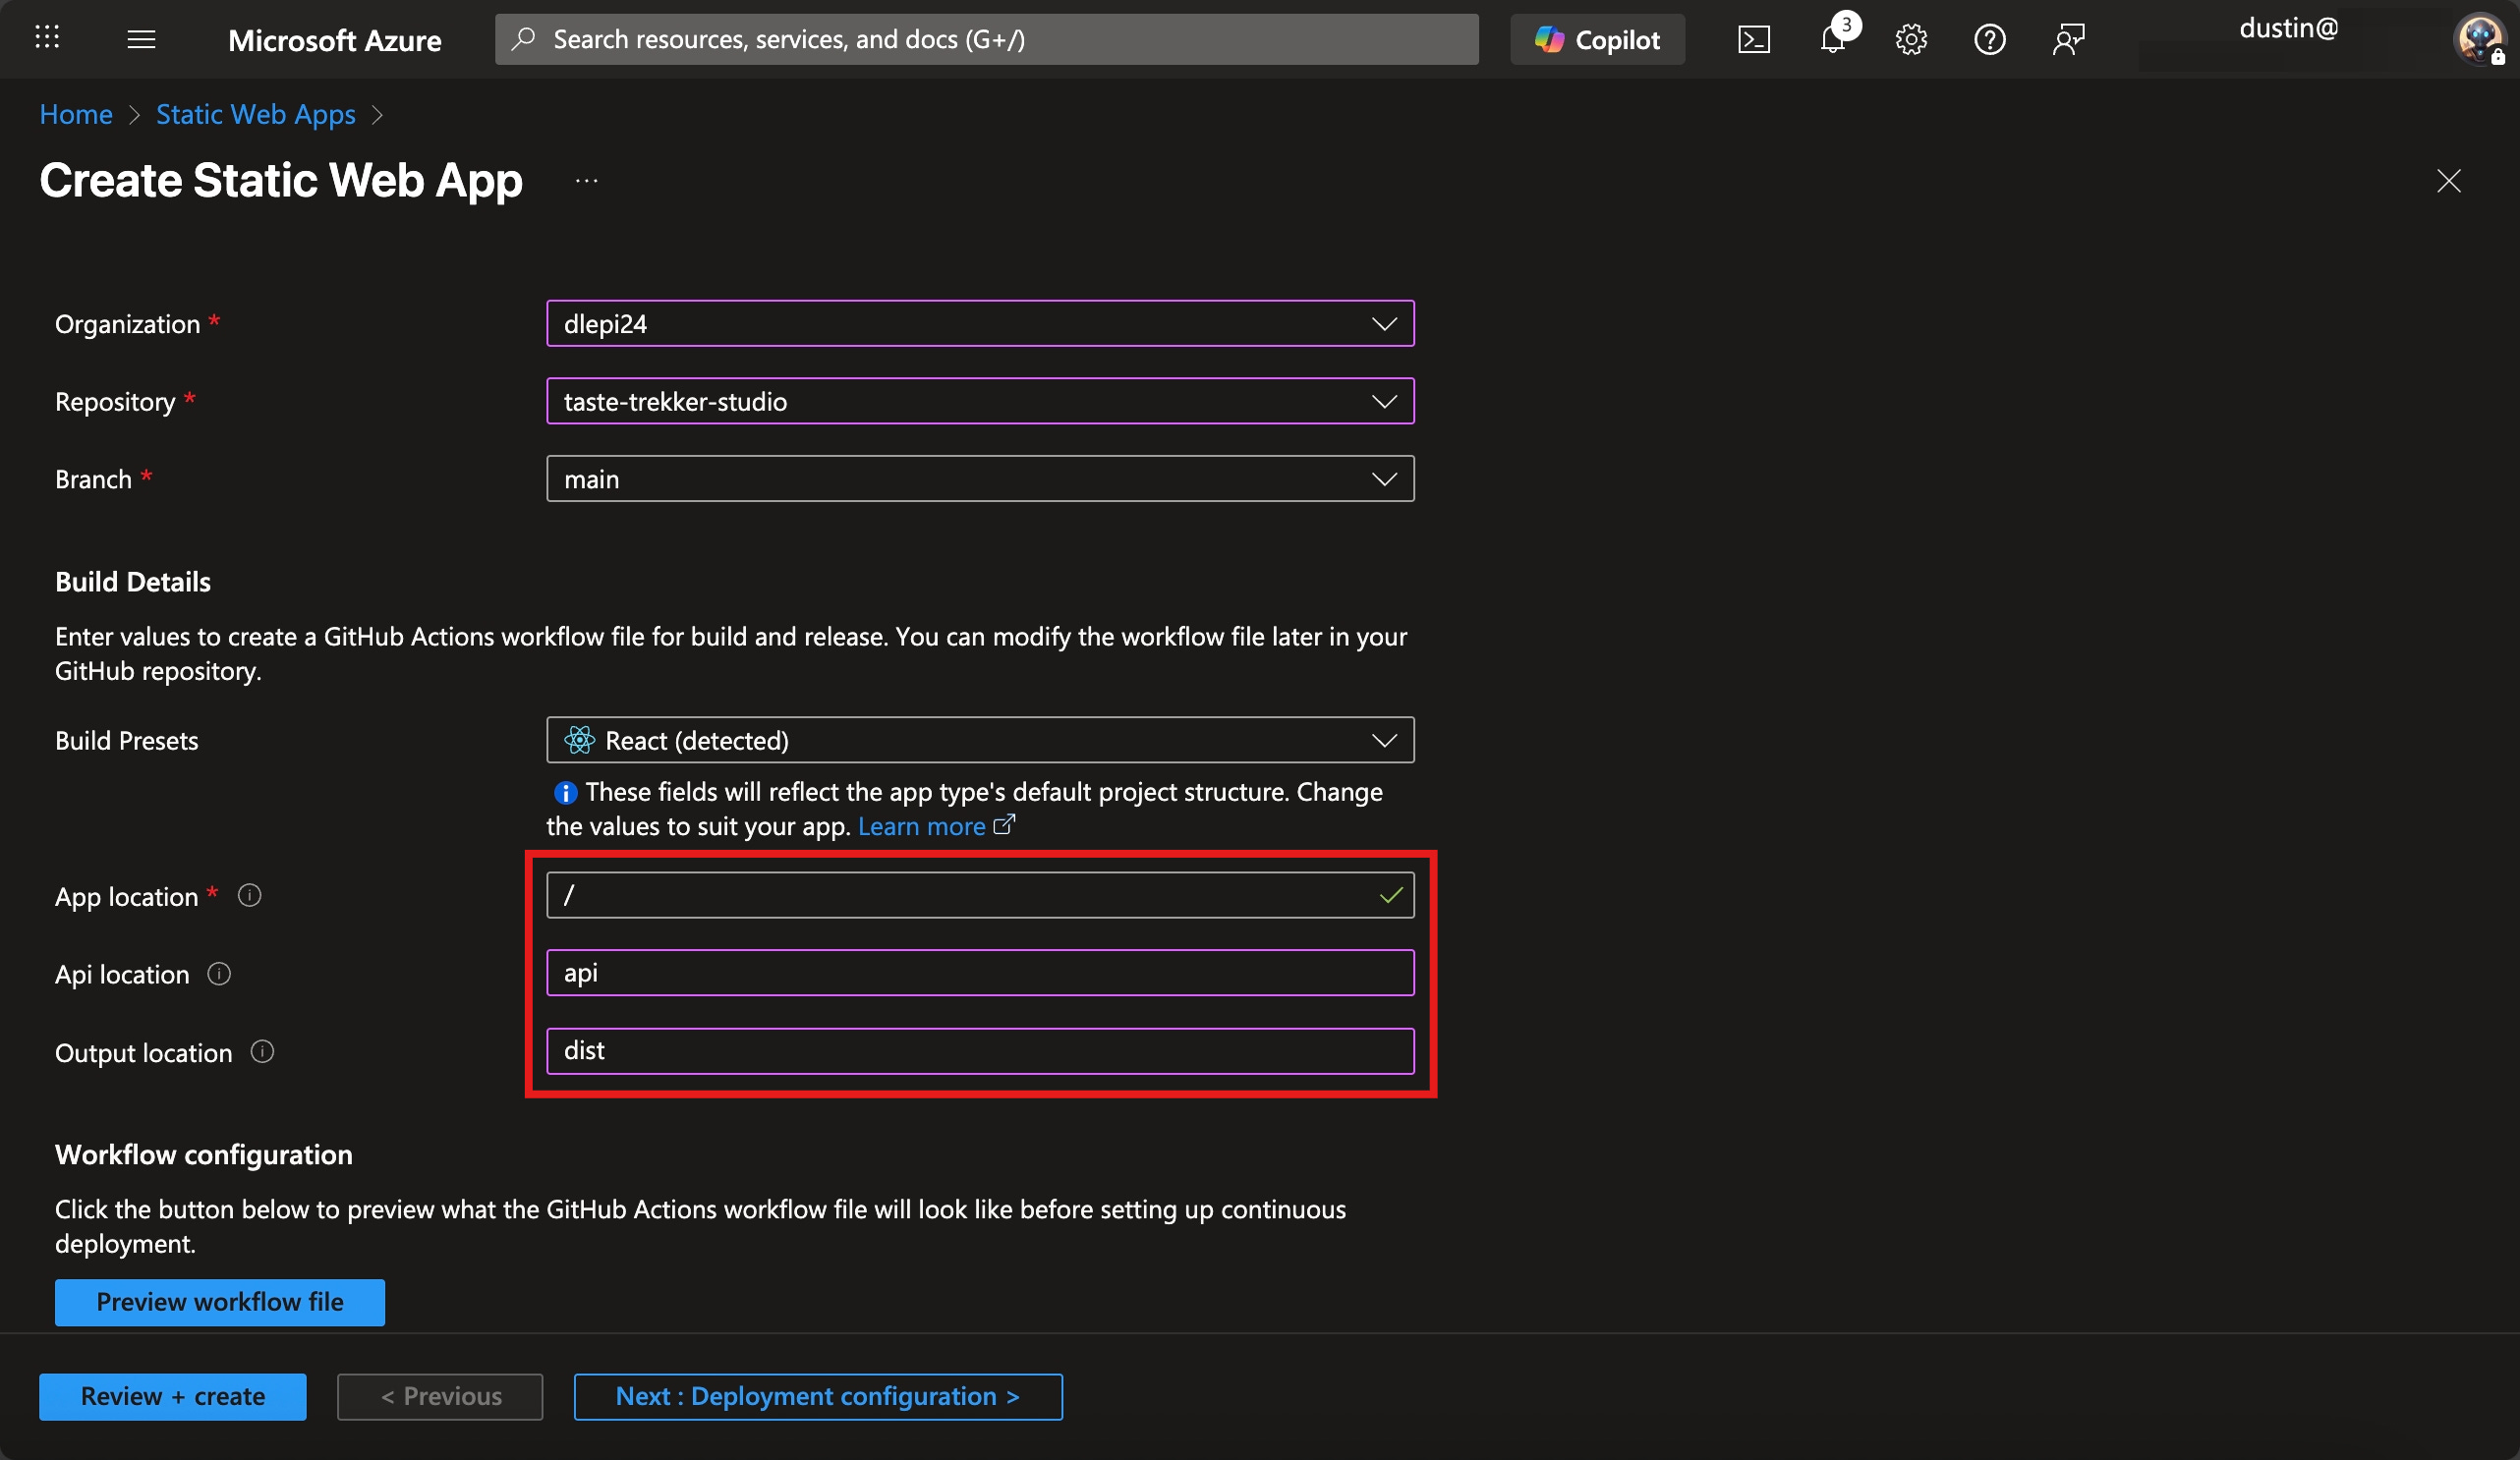
Fill out the required details - select or create a resource group, give your app a name, select your repo from your integrated GitHub account, and set the output location to dist for a smooth launch! I’ll also map the api folder since I’ll be using it, but you might not be!
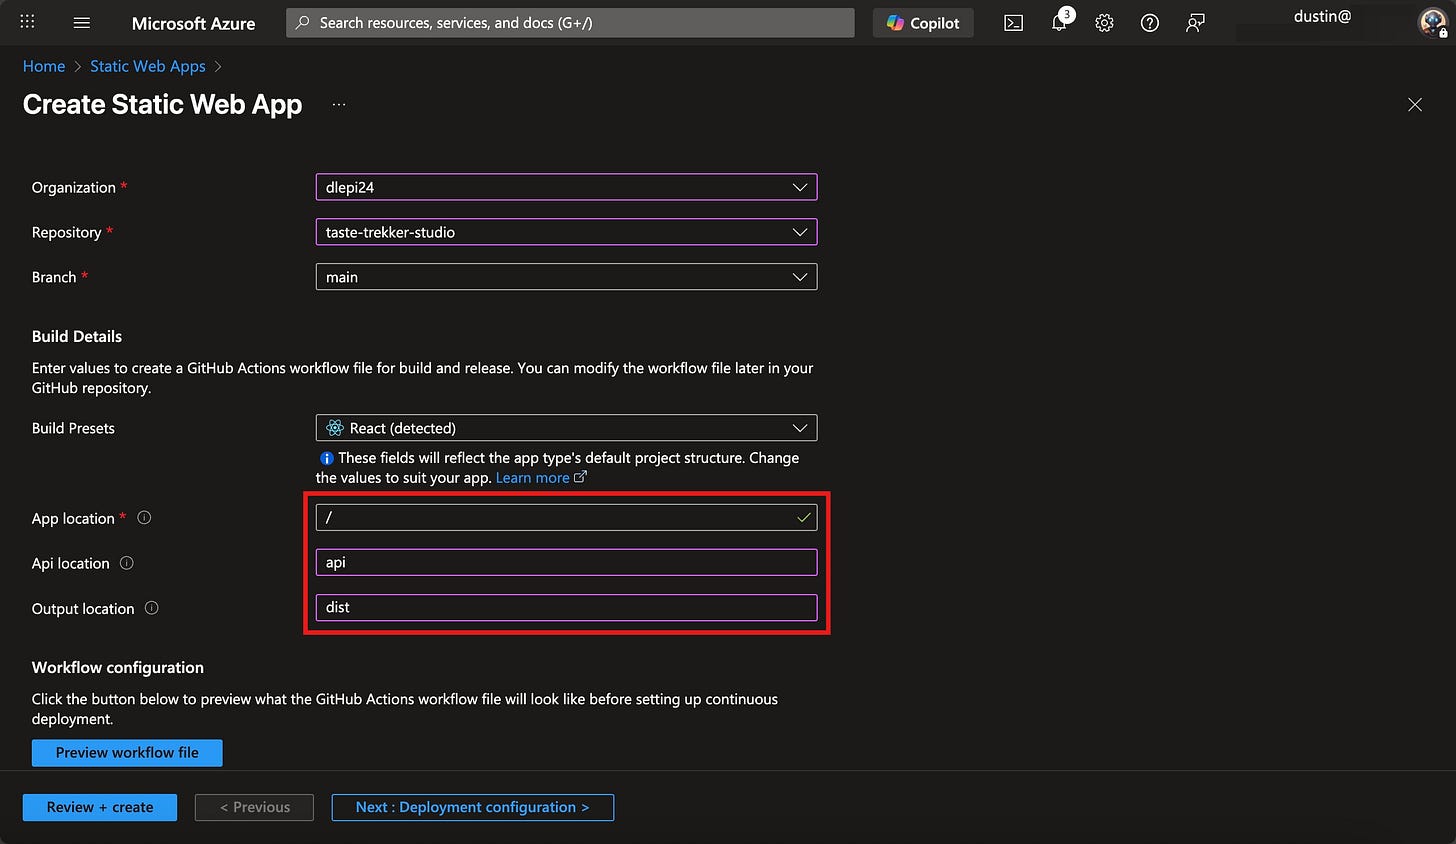
Configuring our Azure Static Web App Before Deployment 📌 Tip: Lovable often uses React and Vite for its creations and it outputs into dist during the build process.
For the Deployment Configuration page select Deployment token.
Create your application and click go to resource once it’s done. It should only take a minute, though it will continue setting up for another 5-10 minutes before it has fully deployed everything it needs.
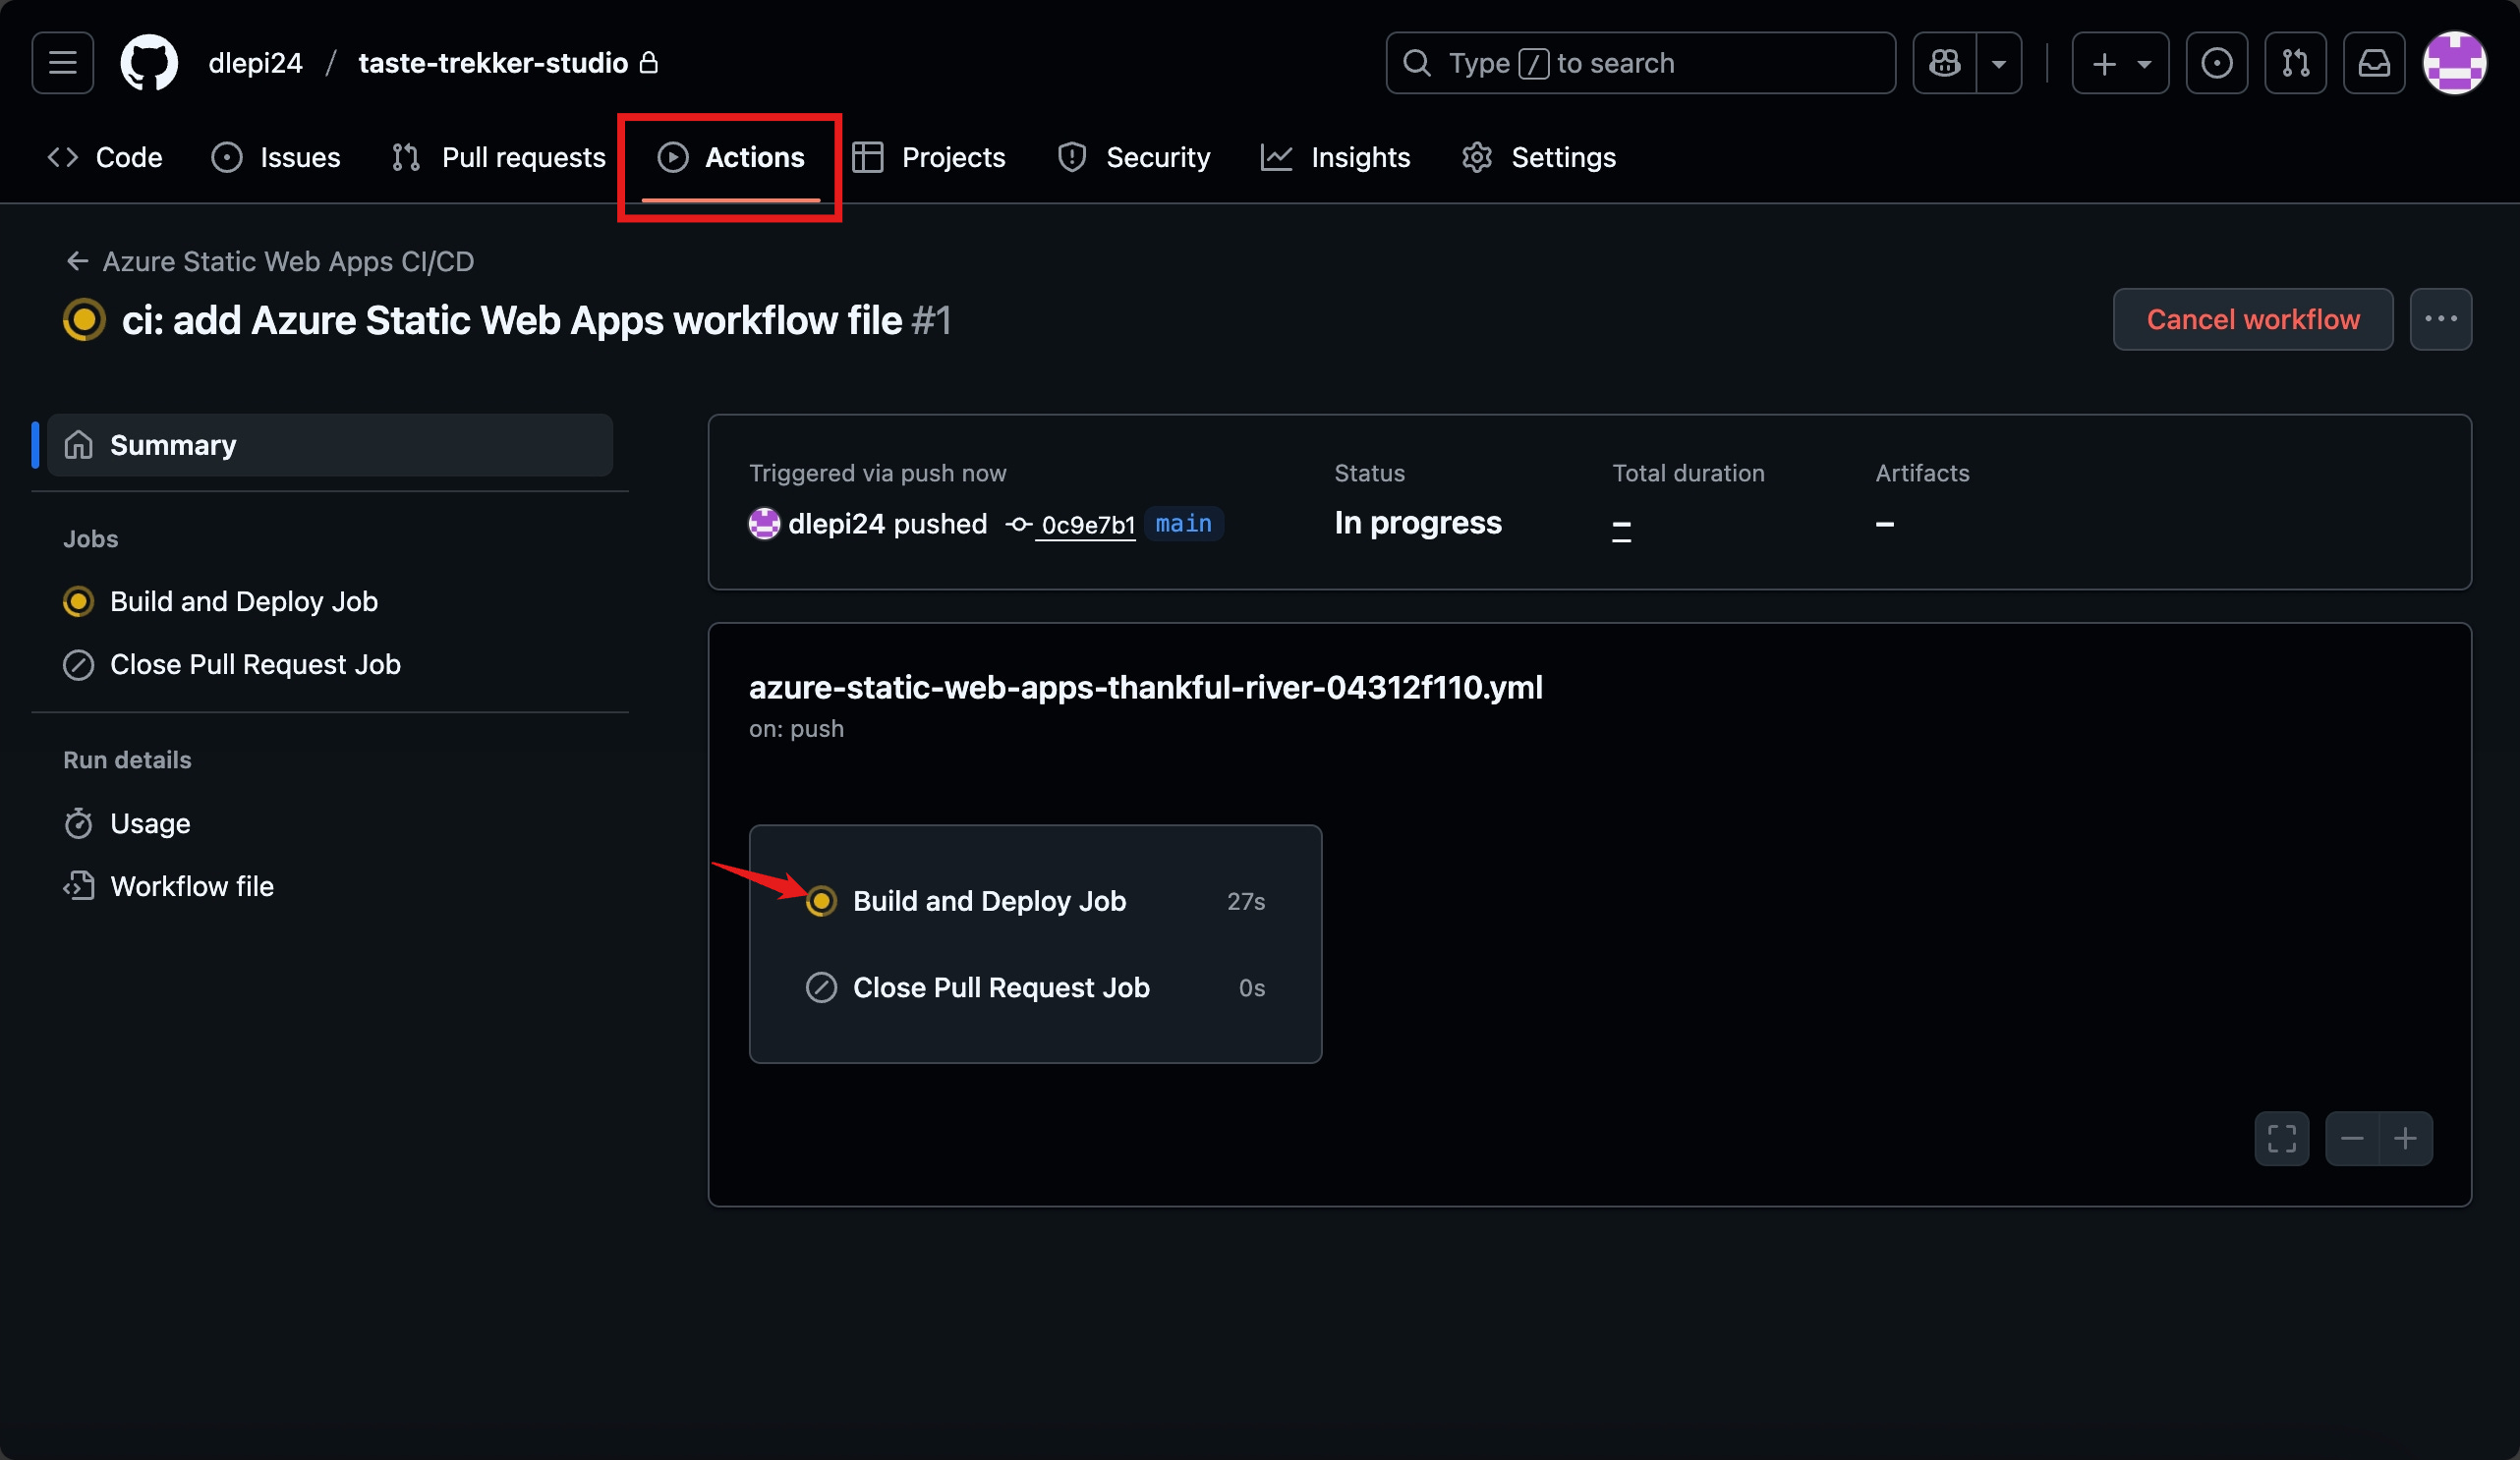
You can monitor and troubleshoot the deployment from GitHub by going to the Actions tab of your repo. This is the CI/CD magic - it runs each time you update your repo and tells Azure to redeploy from your updated code. Review any errors and work through them with Lovable if needed.

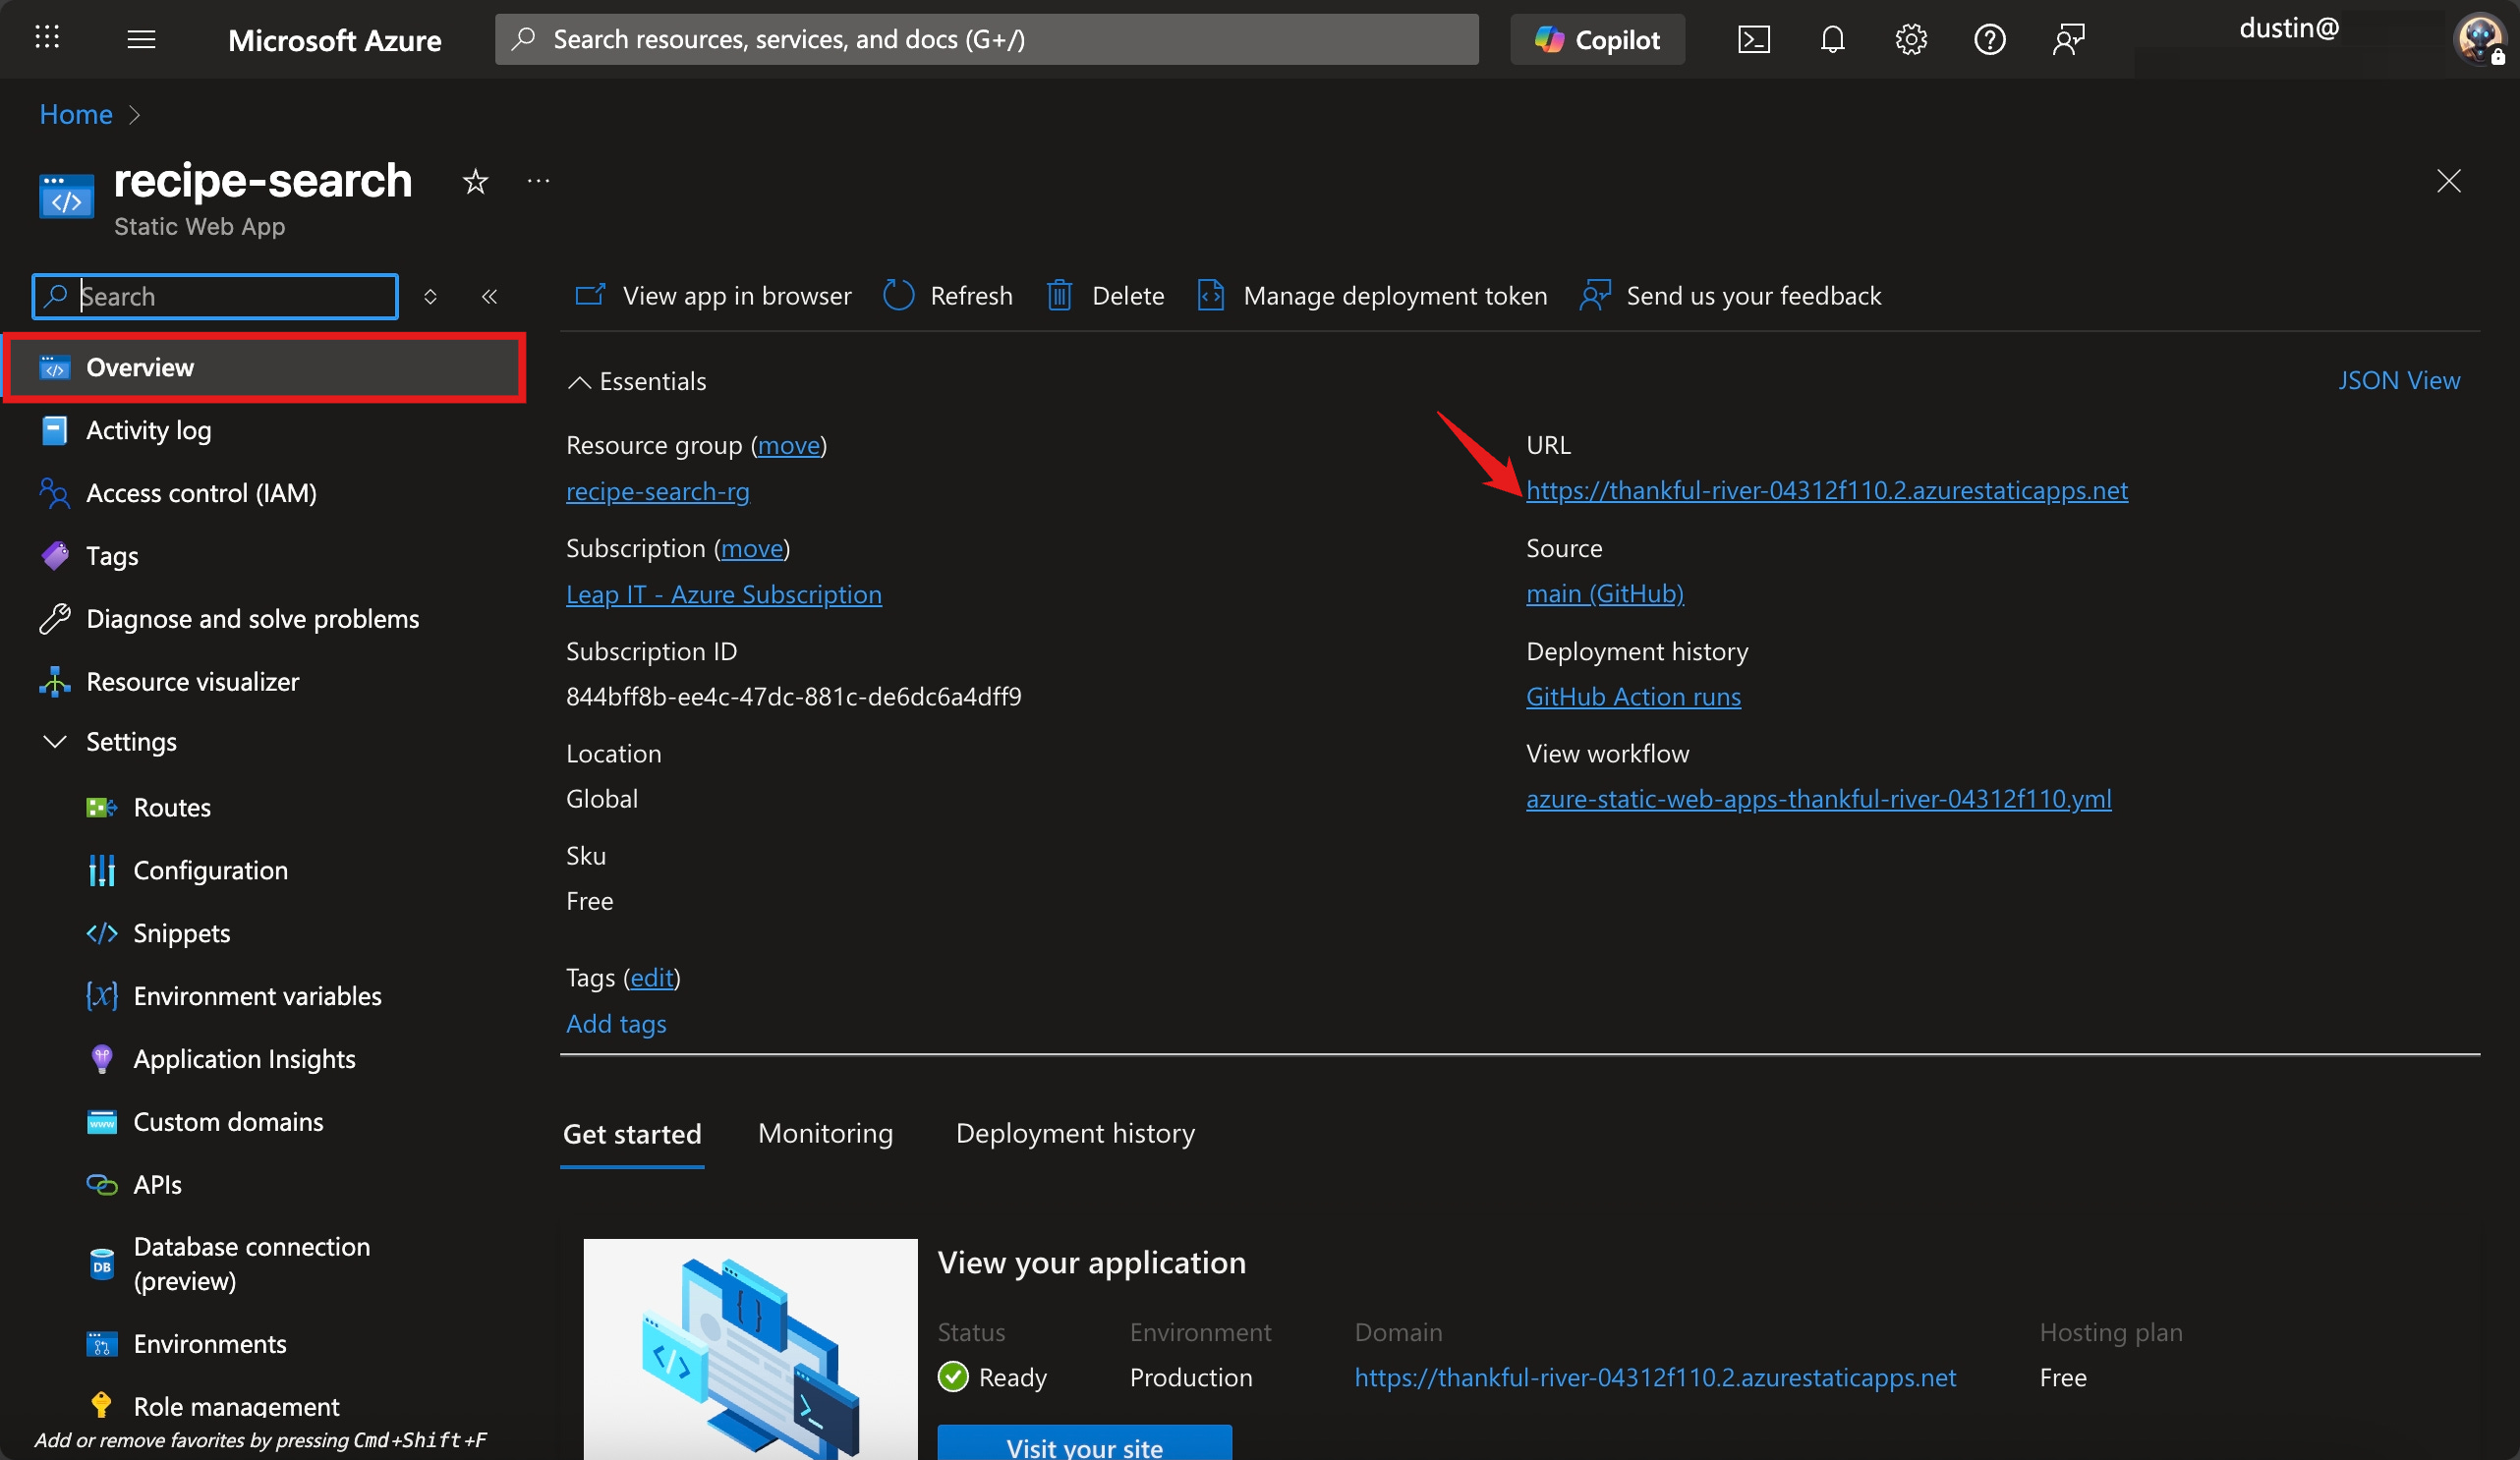
Checking the current GitHub Action Deployment Status From the Azure Overview tab you can see the major configuration settings and details about the app. You can access it from the URL listed in the top-right. We can add a custom domain next.
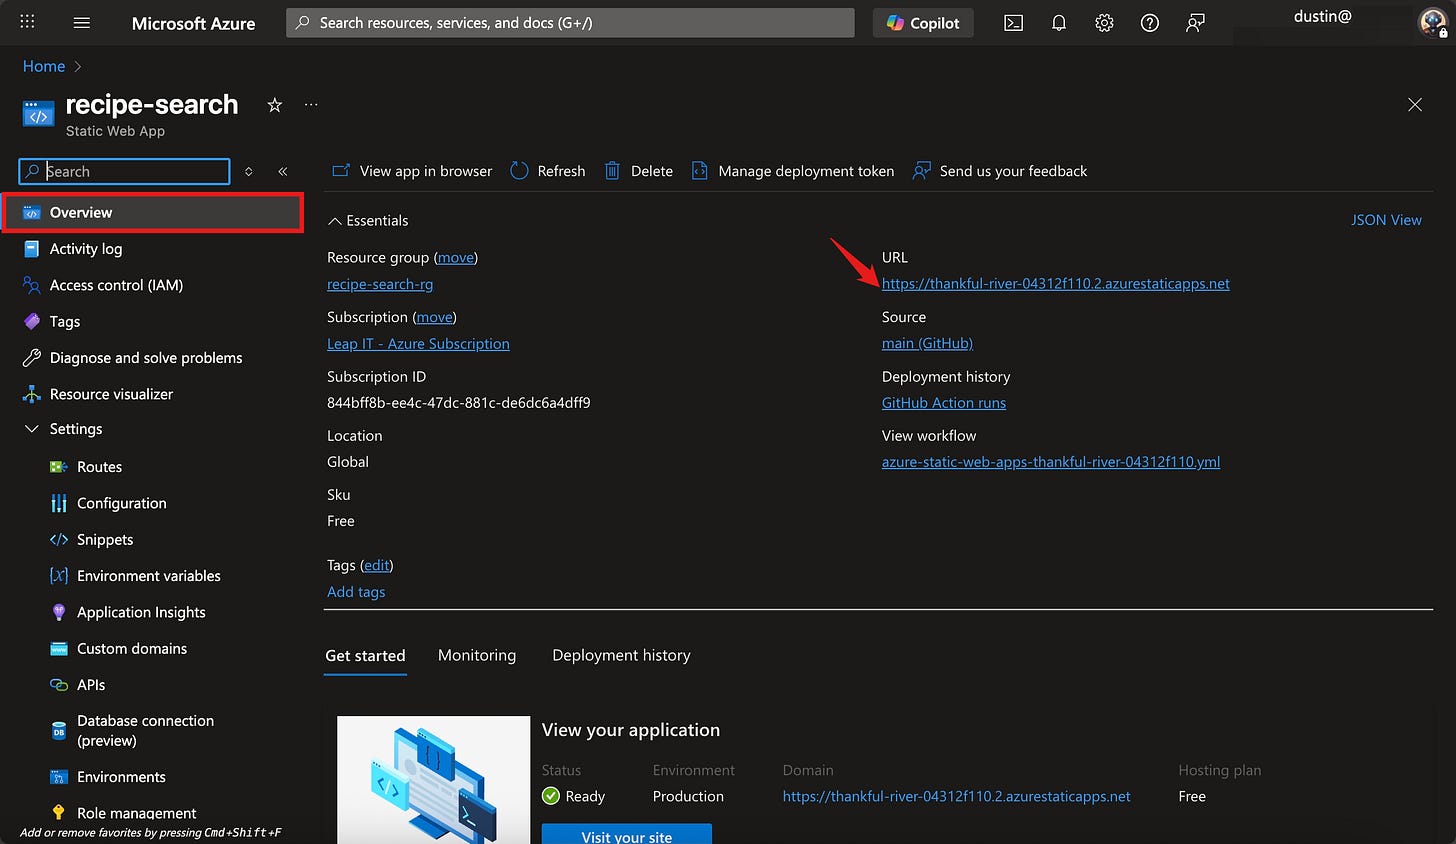
Overview of the Azure Static Web App Blade
From now on as you make updates to your repository it will run the GitHub Action workflow to keep the Azure app updated. Check actions again in the future if you have issues updating the website.
Adding Environmental Variables
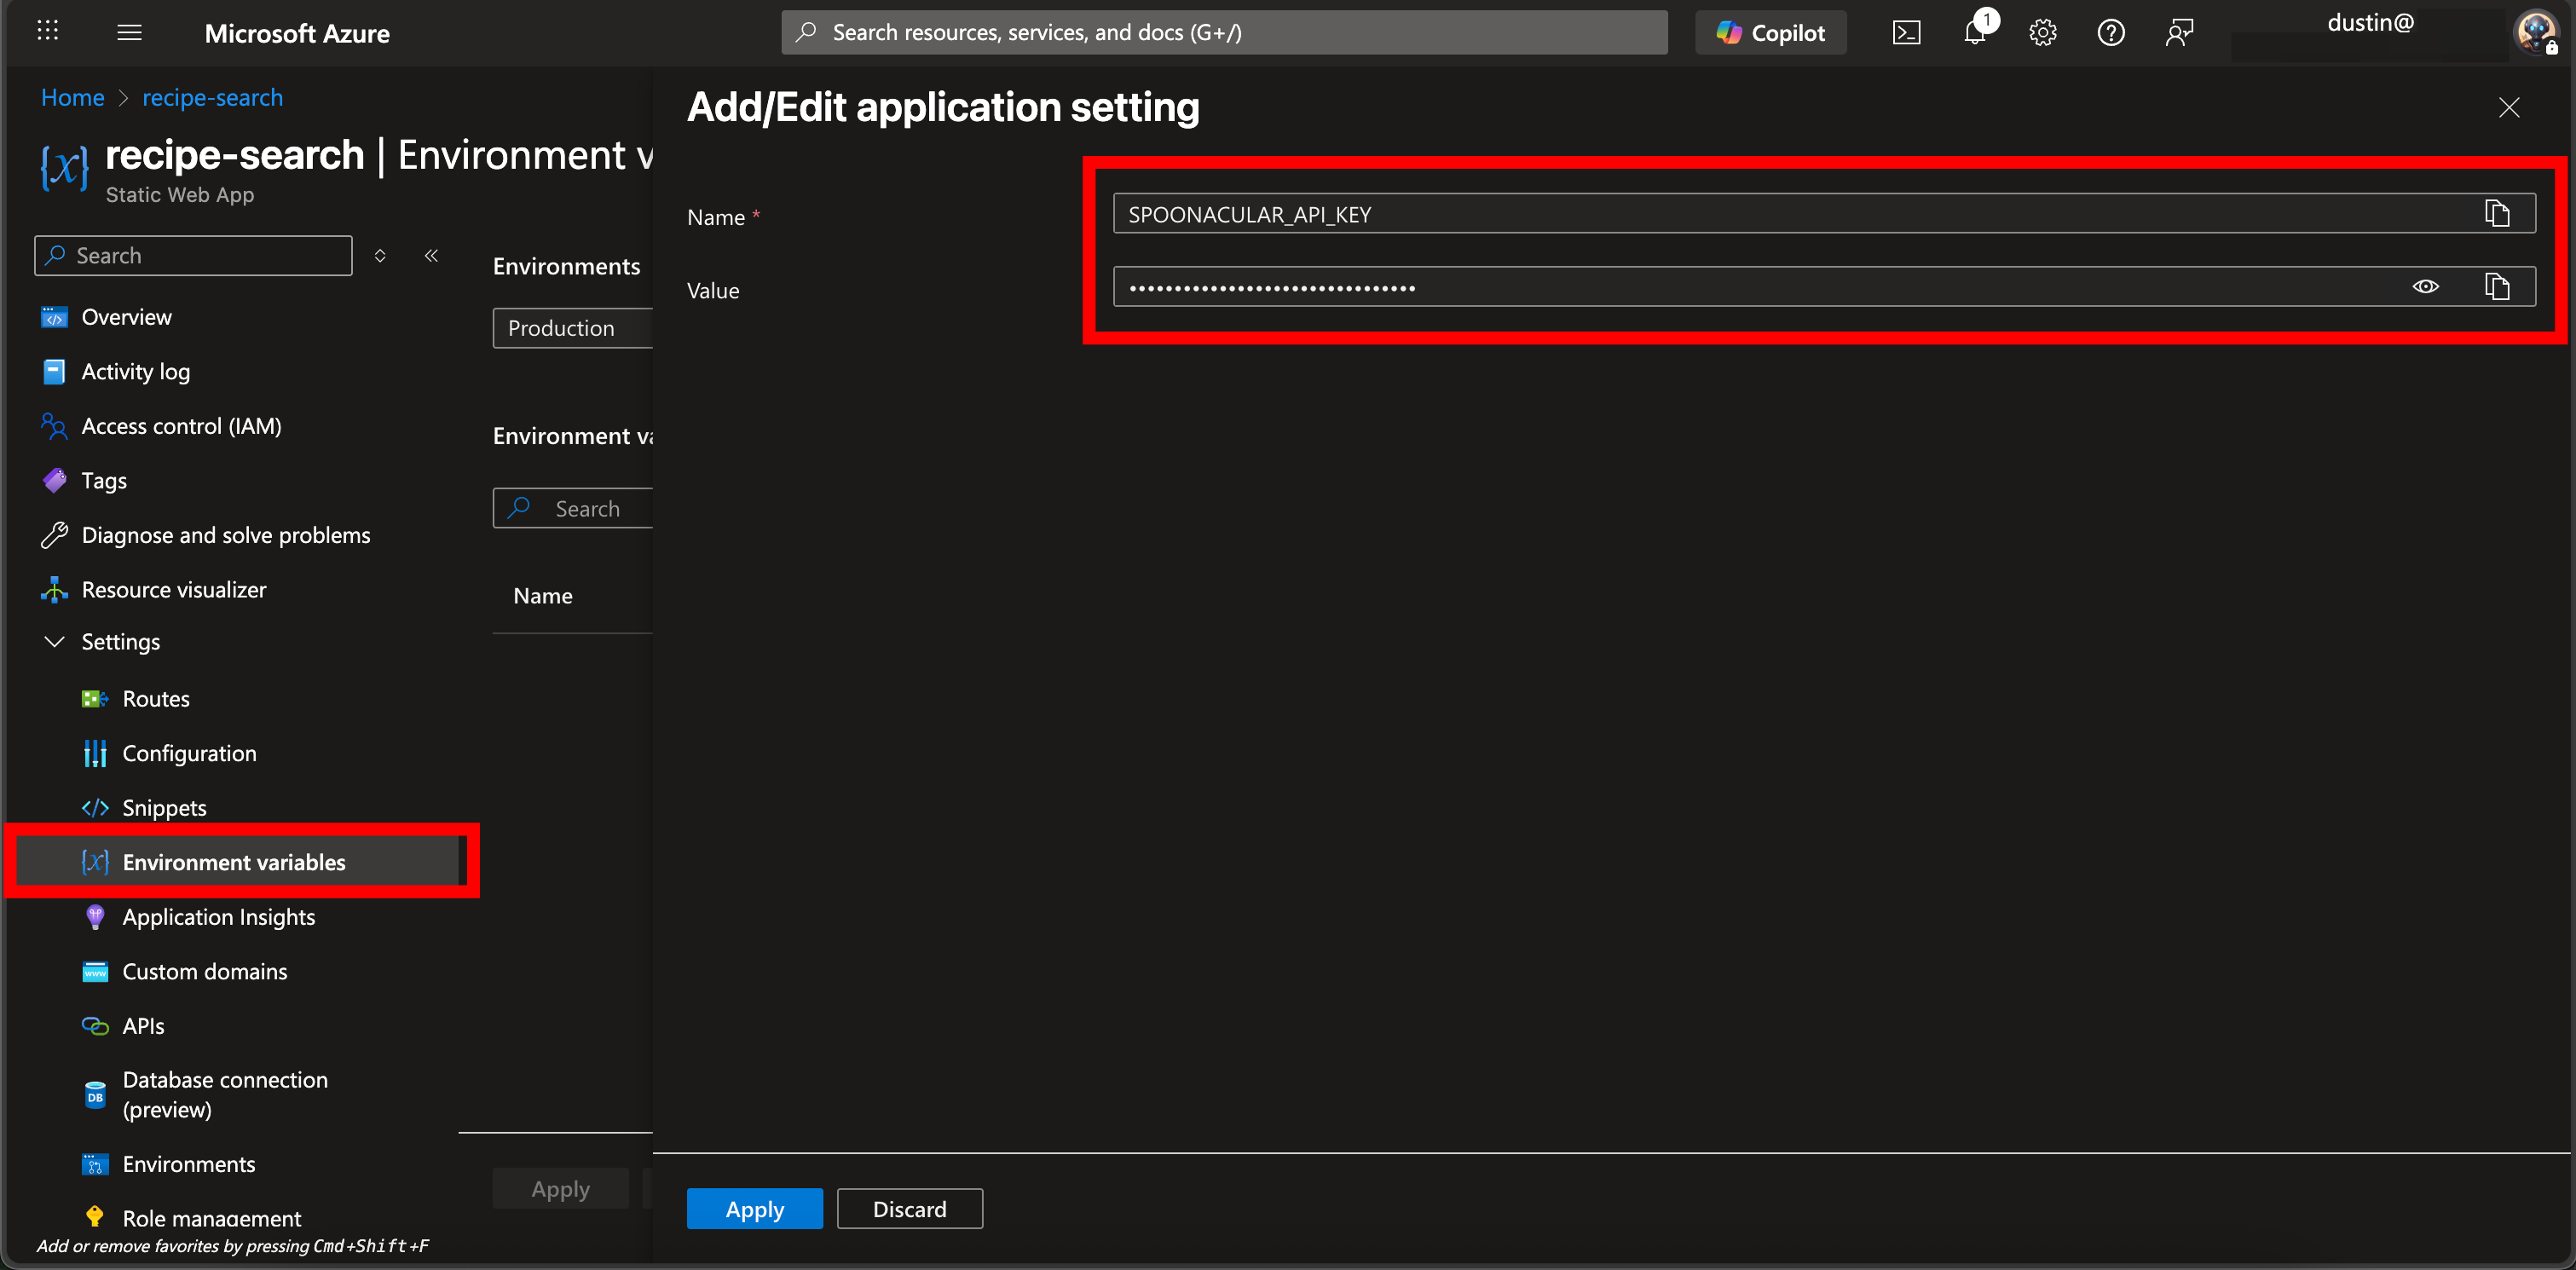
My app uses an Environmental Variable to securely store our API key for Spoonacular instead of hardcoding it. Variables allow you to write dynamic code and increase security as well as improving collaboration and sharing. If your app doesn’t have an API then you can skip this section!
In Azure navigate to Environment Variables on the left side.
Add a new variable named SPOONACULAR_API_KEY and enter the API key secret for the value then save it.
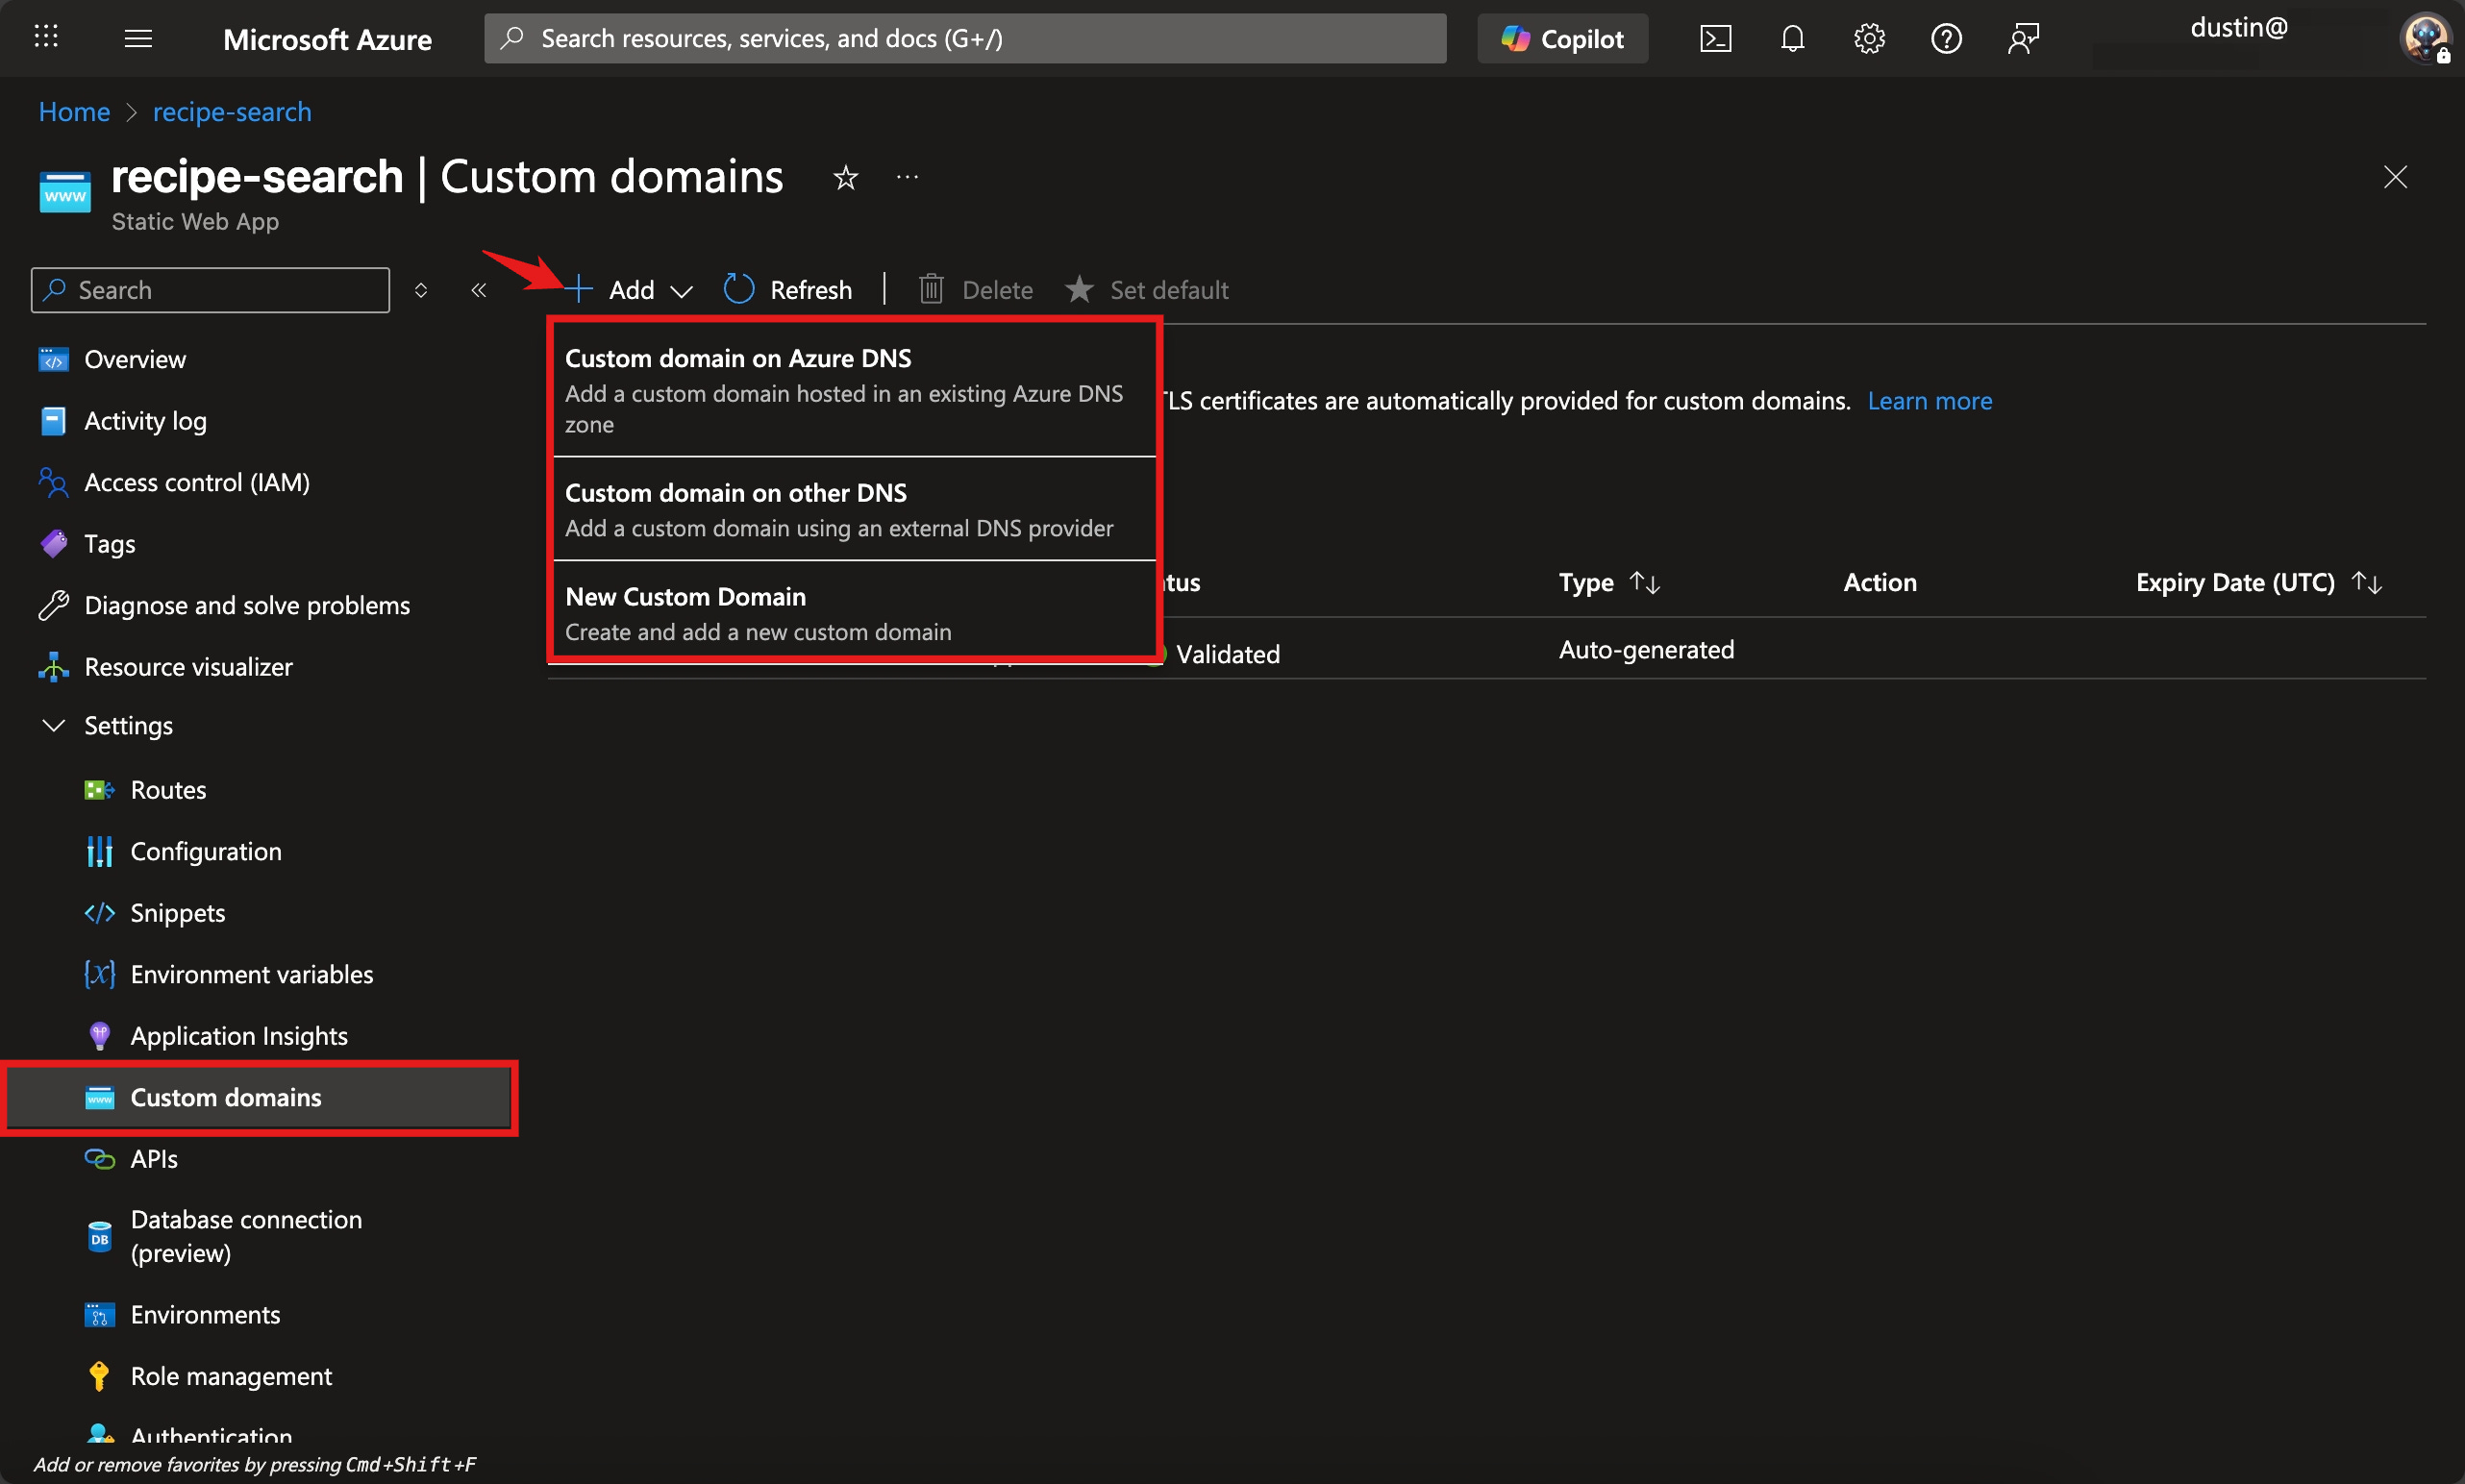
Adding a Custom Domain
You got your website up and running and could technically call it quits here, but you’ll probably want to route it to a custom domain if you have one.
Click custom domains and then add a ‘Custom domain on other DNS’ unless you already use Azure to manage your domain, in which case you would choose the first option.

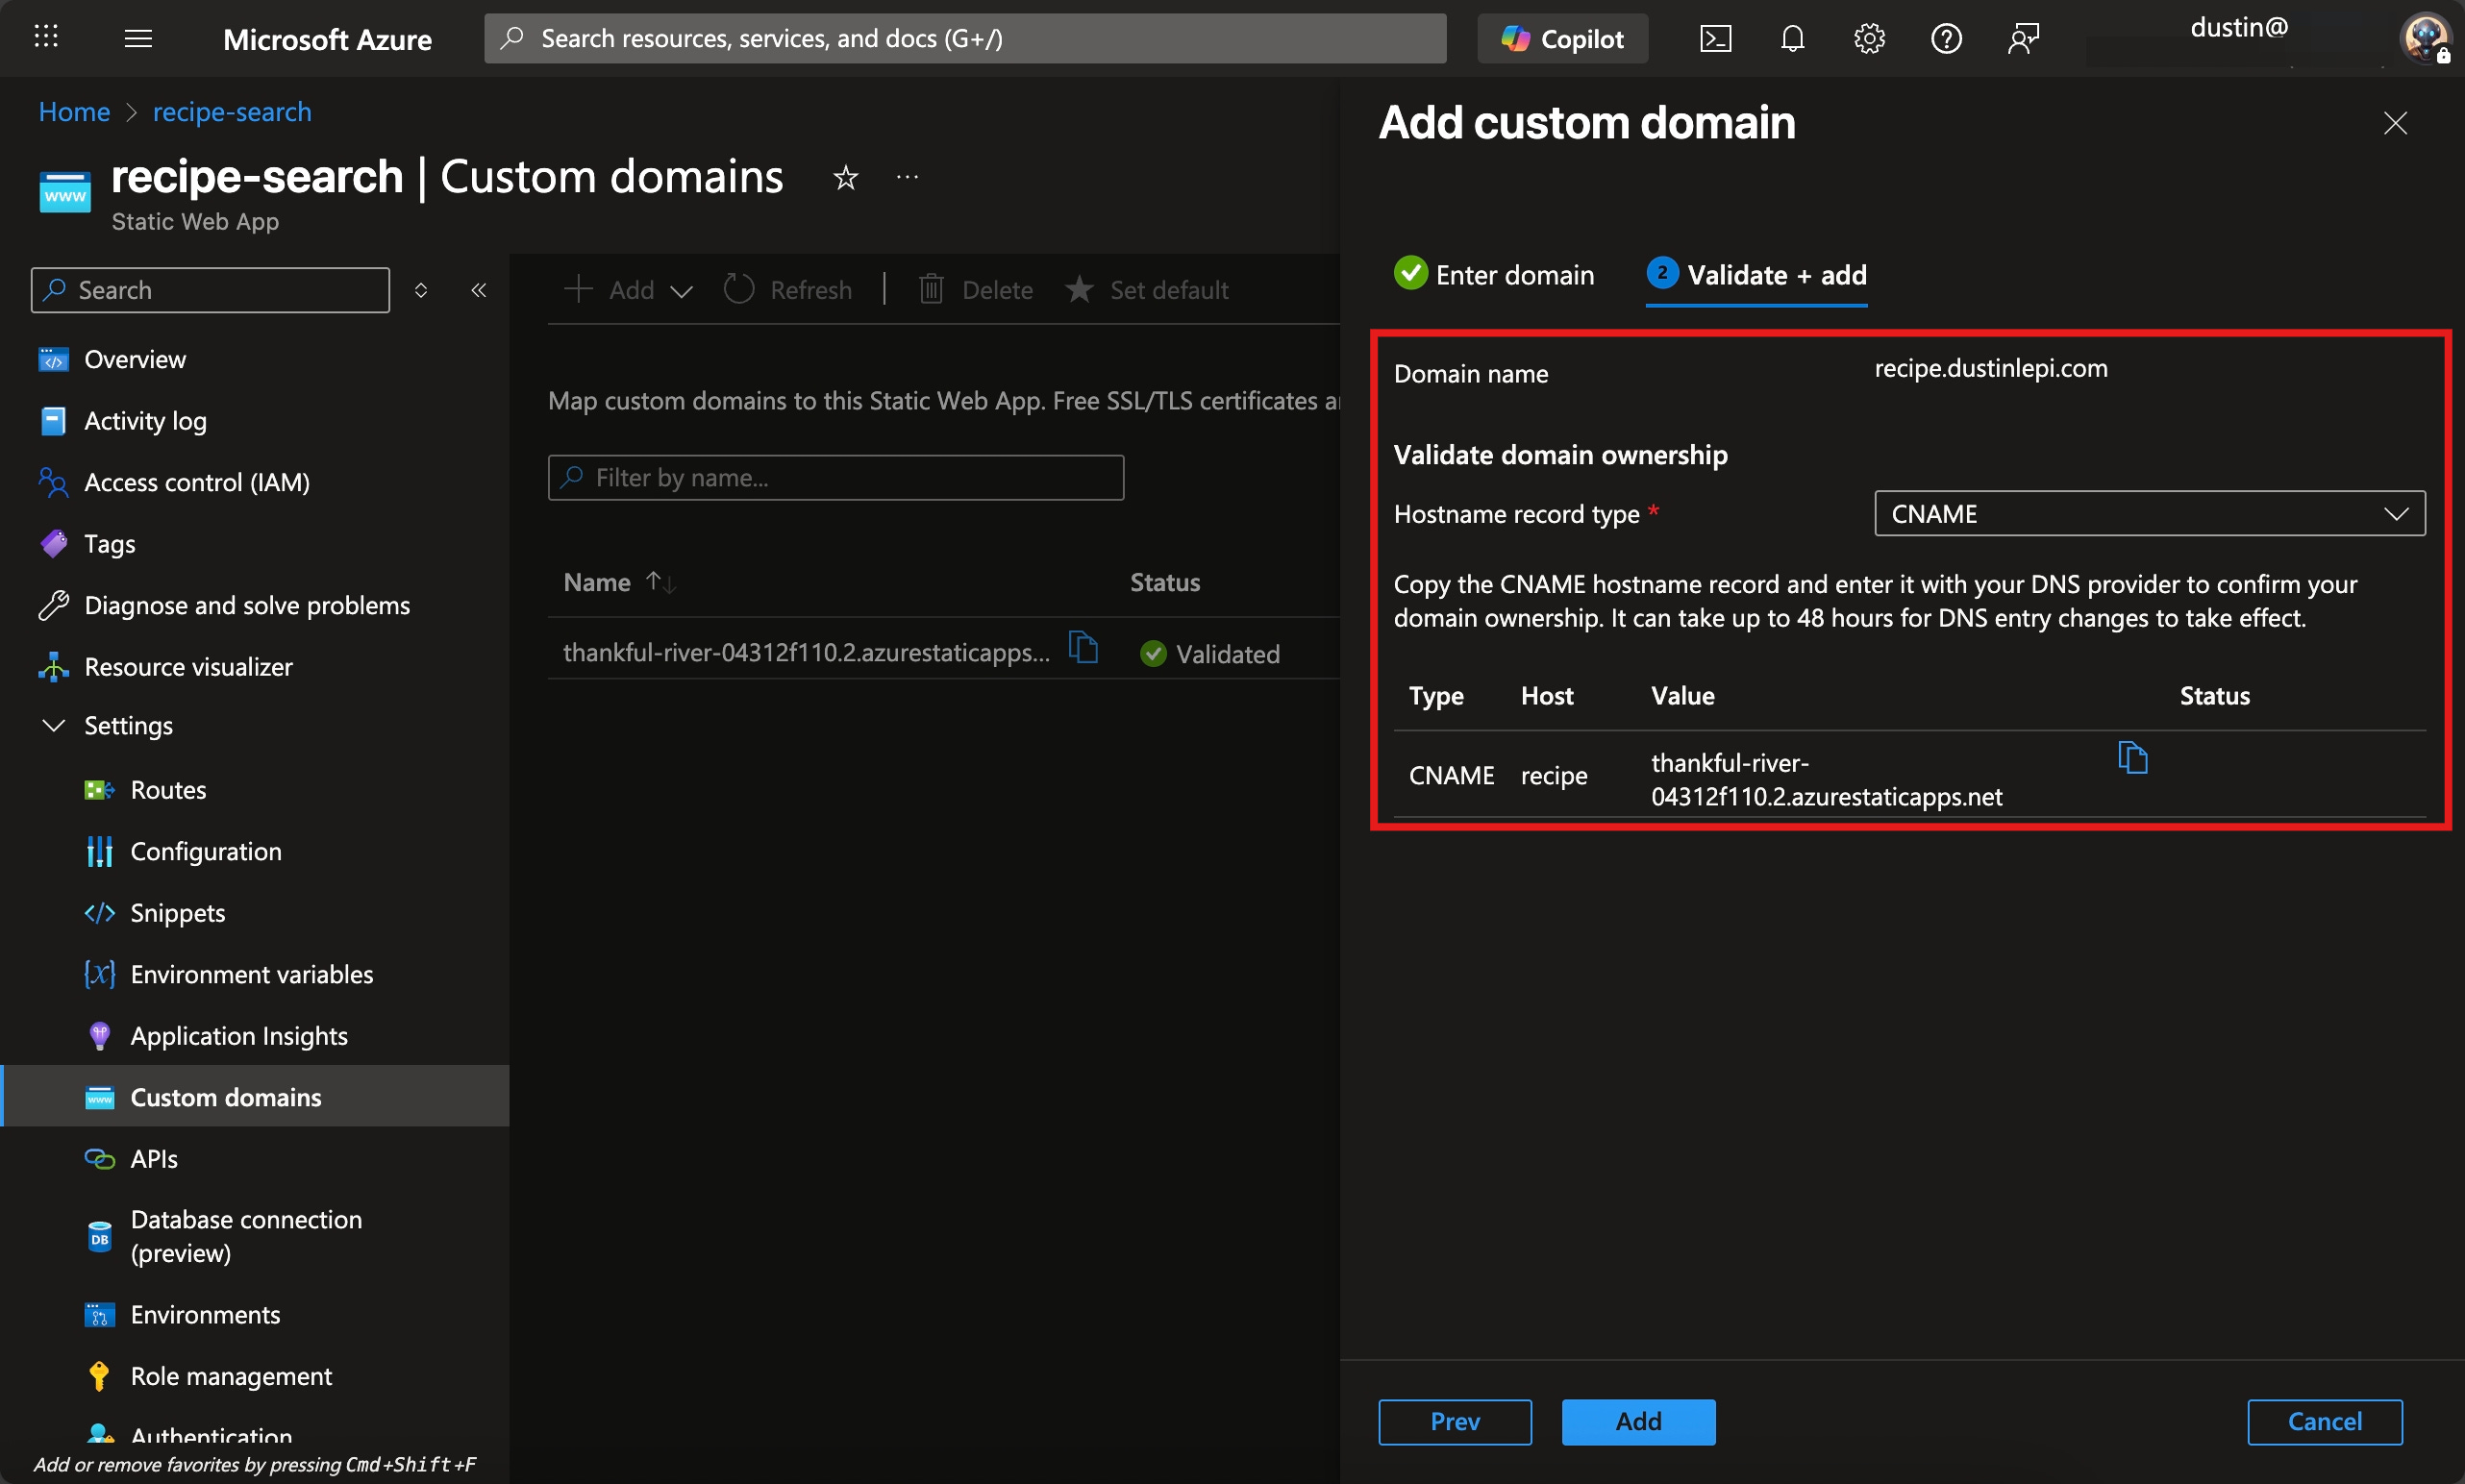
Adding a Custom Domain Name to our Web App Enter your preferred domain name for the website. I’m going to use recipe.dustinlepi.com for this app.
Azure will supply you with the DNS records to add, so you’ll need to navigate to wherever you manage your domain’s DNS. For me that’s going to be Cloudflare.

Azure Provides the Necessary DNS Records for the Custom Domain Add your new DNS records and save. If you also use Cloudflare then you’ll want to toggle off their proxy protection.
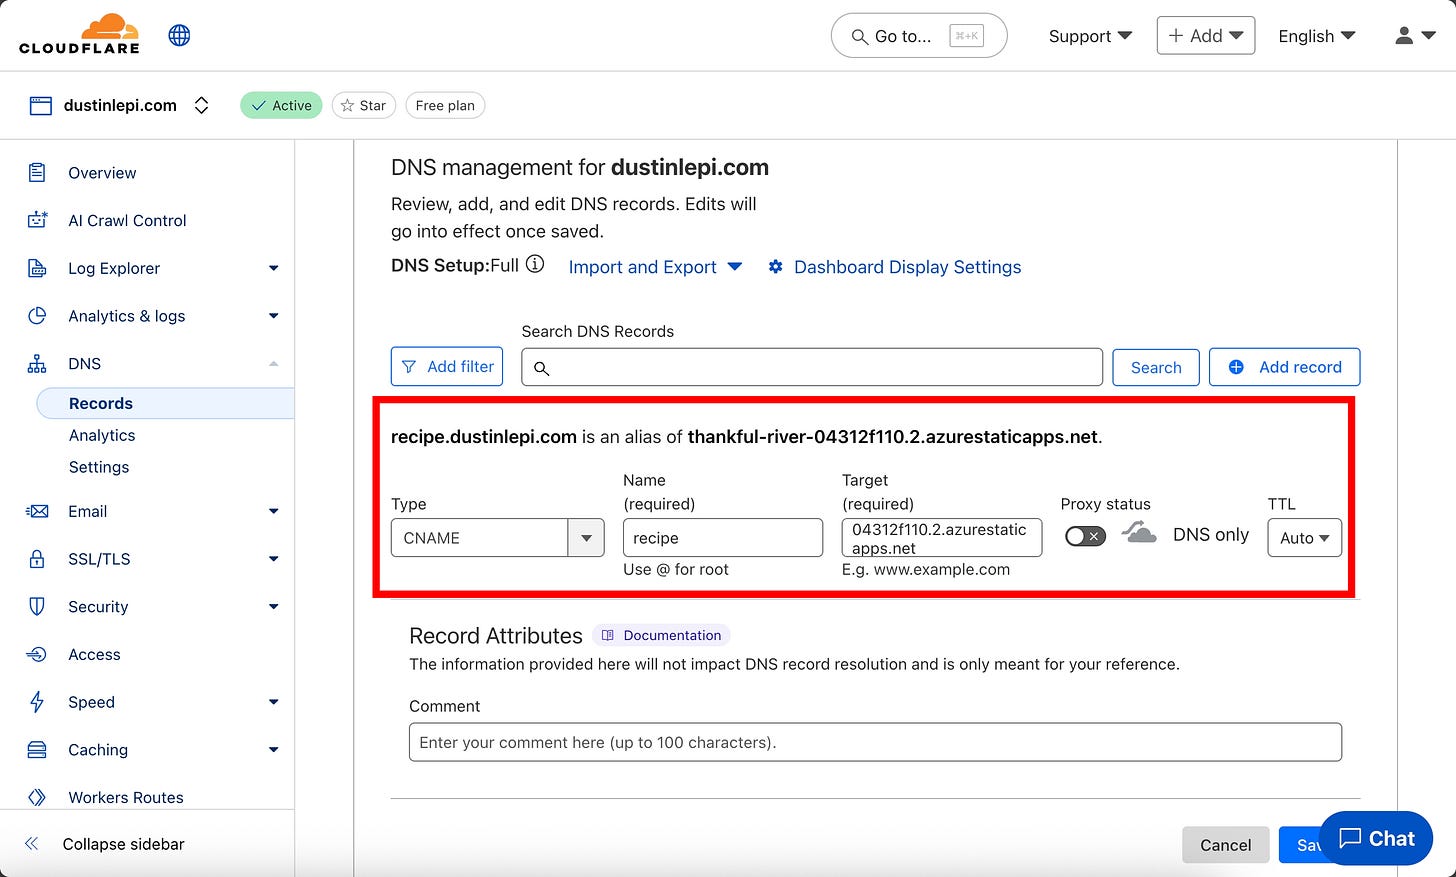
Adding DNS Records to the Domain Registrar Back in Azure click add to wrap up. DNS may take some time to propagate so don’t worry if you see an error at first. If everything is correct, it will eventually succeed.
Set your new domain to be your default domain unless you have reason not to.
All done! Hopefully you can now access your website by its custom domain.
Conclusion
If you’re like me, you may need to go revisit Lovable and flesh out your app some more. As you continue working with Lovable it will push updates to GitHub, which in turn push changes to your website. You can also configure Lovable to push changes to a secondary dev branch in GitHub instead of “pushing to prod”. Once you are ready to update prod you can initiate a pull request from the dev > main branch and commit your new changes.
All of this robust Enterprise cloud technology, and it’s free! We’ve barely scratched the surface of features in Static Web Apps, like environmental variables, incorporating databases, or adding function apps for API endpoints. Want to learn more? Here’s a similar Microsoft training you can follow along with, or get the blog’s example website from the GitHub repository here!