
Azure Foundry: Build Your Own AI
Skip the ChatGPT Subscriptions and Create Your Own AI with Azure Foundry
Azure Foundry is Microsoft’s AI platform targeted towards developers for creating everything AI - assistants, chat agents, content generation, and more. Platforms like OpenAI charge users monthly subscriptions for limited access, while Foundry allows you to choose from dozens of the most popular models and pay for exactly what you use (with no cooldown periods). Azure resources are consumption based and use pay-as-you-go billing based on current model pricing. Using one of the latest models, like GPT 5 Nano, it would cost us approximately $0.40 per 1 million tokens. That’s around 750,000 words generated, or 2,428 copies of Harry Potter and the Sorcerer’s Stone to be precise.
Don’t get me wrong - Azure Foundry can be intimidating and it’s not nearly as user friendly as Grok or ChatGPT, but they don’t give you this level of access to developing and building your custom solutions. In just a few clicks you can deploy your own models with instant access using the Playground or utilize the REST API endpoints and integrate them into your application. You can expand even further by creating your own RAG pipeline with Vector Database storage and build your own custom agents.
Deploying Azure Foundry
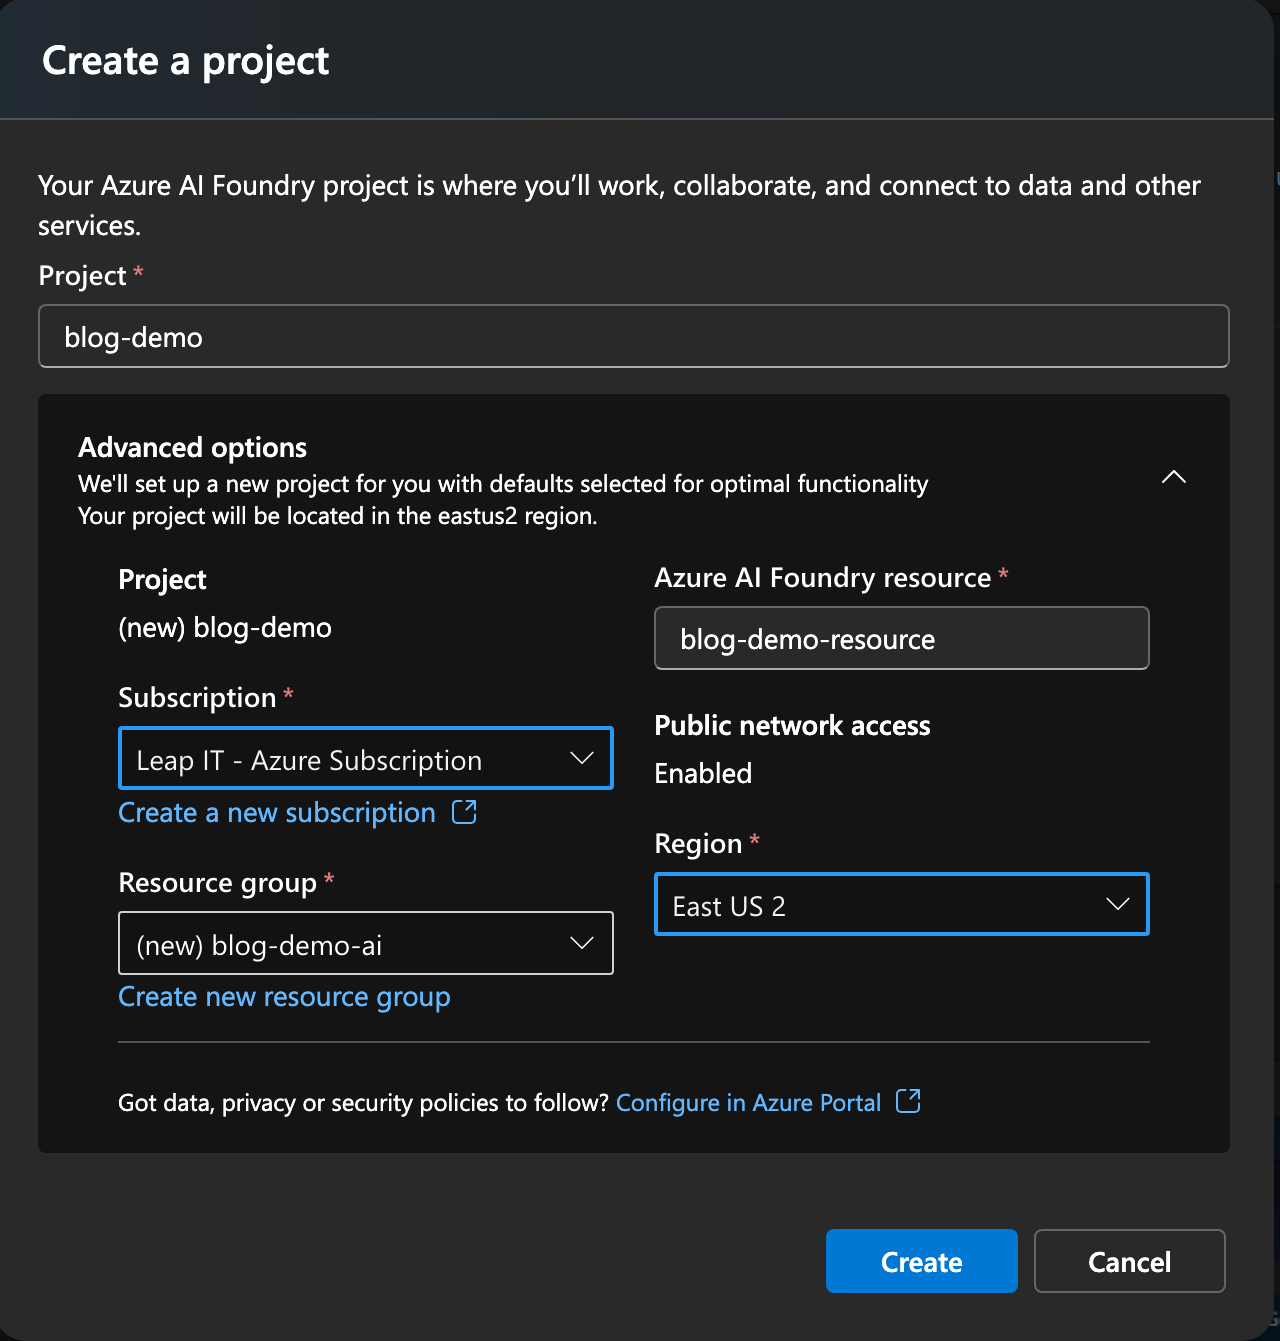
You can access the Foundry portal from ai.azure.com and follow the Getting Started steps. In short, you’ll want to create a new project, ideally in East US 2 as your region - each region has limited access to models, but East US 2 has a good overall selection. Depending on the models you want to use, you may need to choose a different region but you can easily do that when the time comes. Review the pricing pages to filter on specific regions and see what’s available.
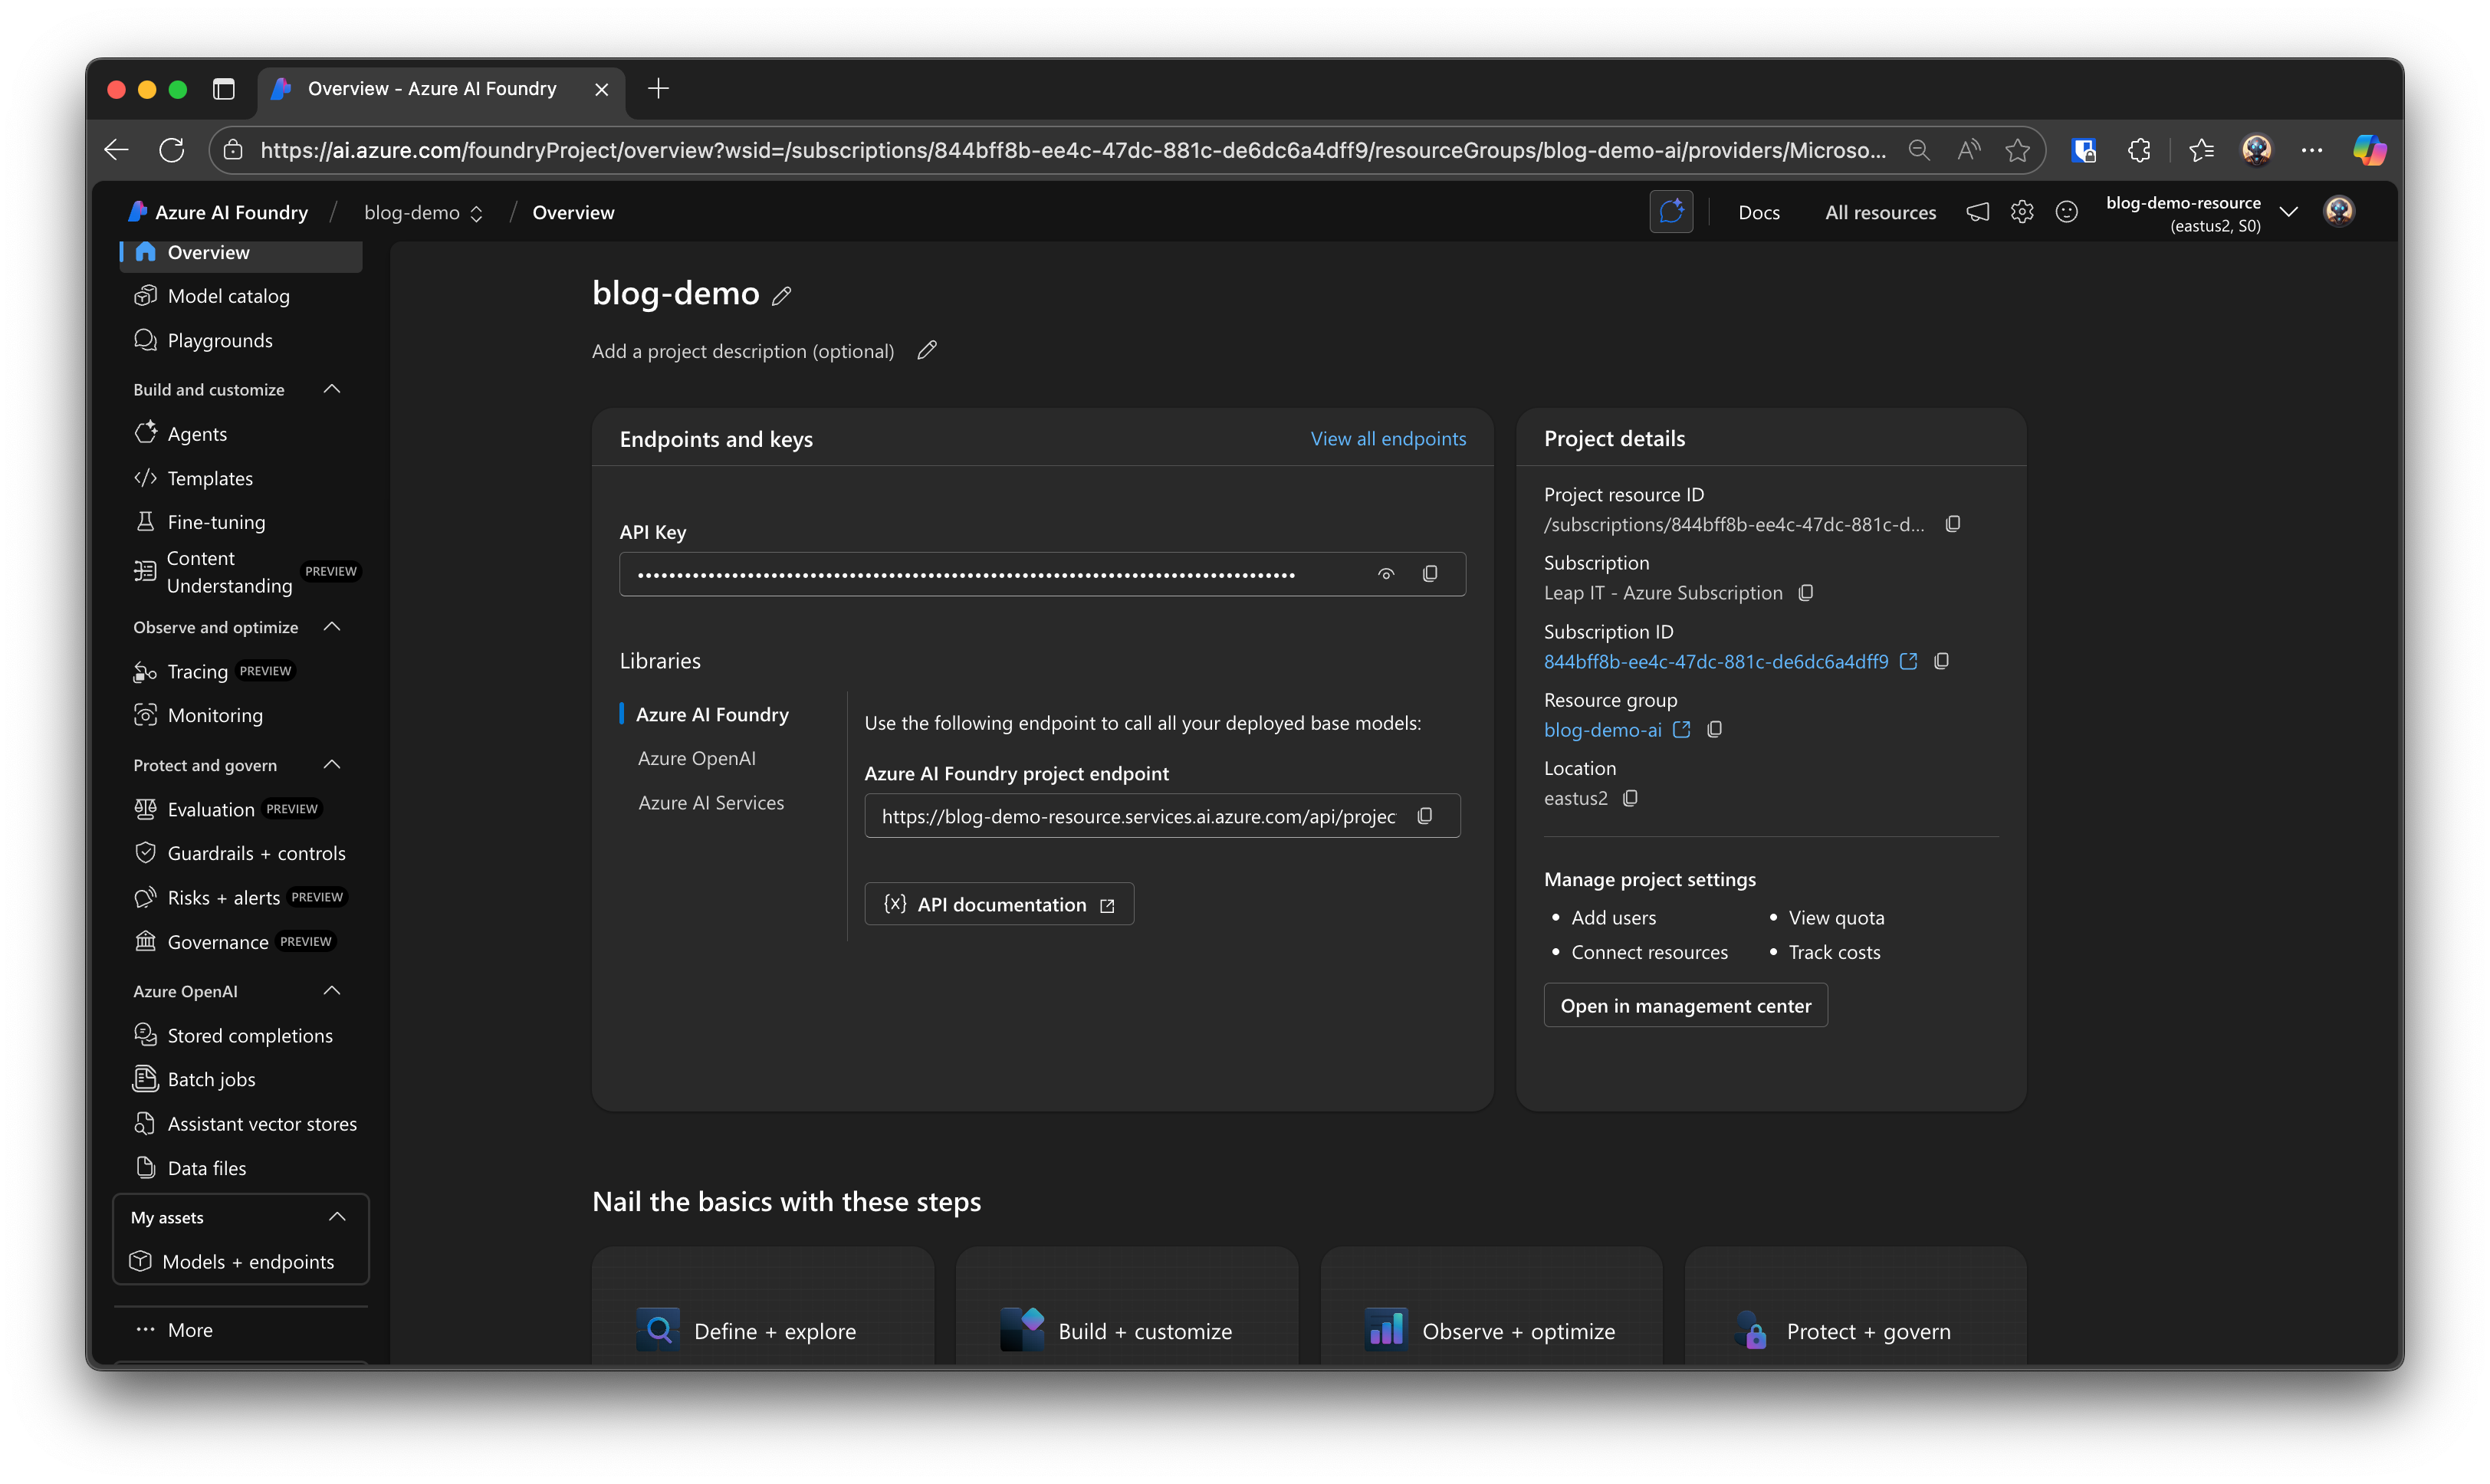
Once deployed, you should see a Project Overview page that probably looks pretty intimidating. Let’s break the navigation menu down into pieces:
Overview is showing you the information needed to integrate into an application. Here you can see the base endpoints and API key for your project. Azure has done a pretty good job of simplifying endpoints but there are a handful depending on your usages.
Resource Selector is along the top ribbon menu. As you build further and expand to more projects you’ll be able to swap between them all here.
Model Catalog is the list of models for deployment. Just click one and deploy to get started!
Playgrounds is the quick and dirty workspace to test your deployed models, agents, assistants, etc. Use your models here with minimal setup.
Agents are the evolution of chatbots, capable of performing tasks directly rather than just providing answers.
Assistant vector stores are an easy way to upload files and folders in bulk to give your models or agents the additional custom context and knowledge it needs to level up.
Models + endpoints is a one stop shop for all your current deployed models and resources.
Deploying Your First Model
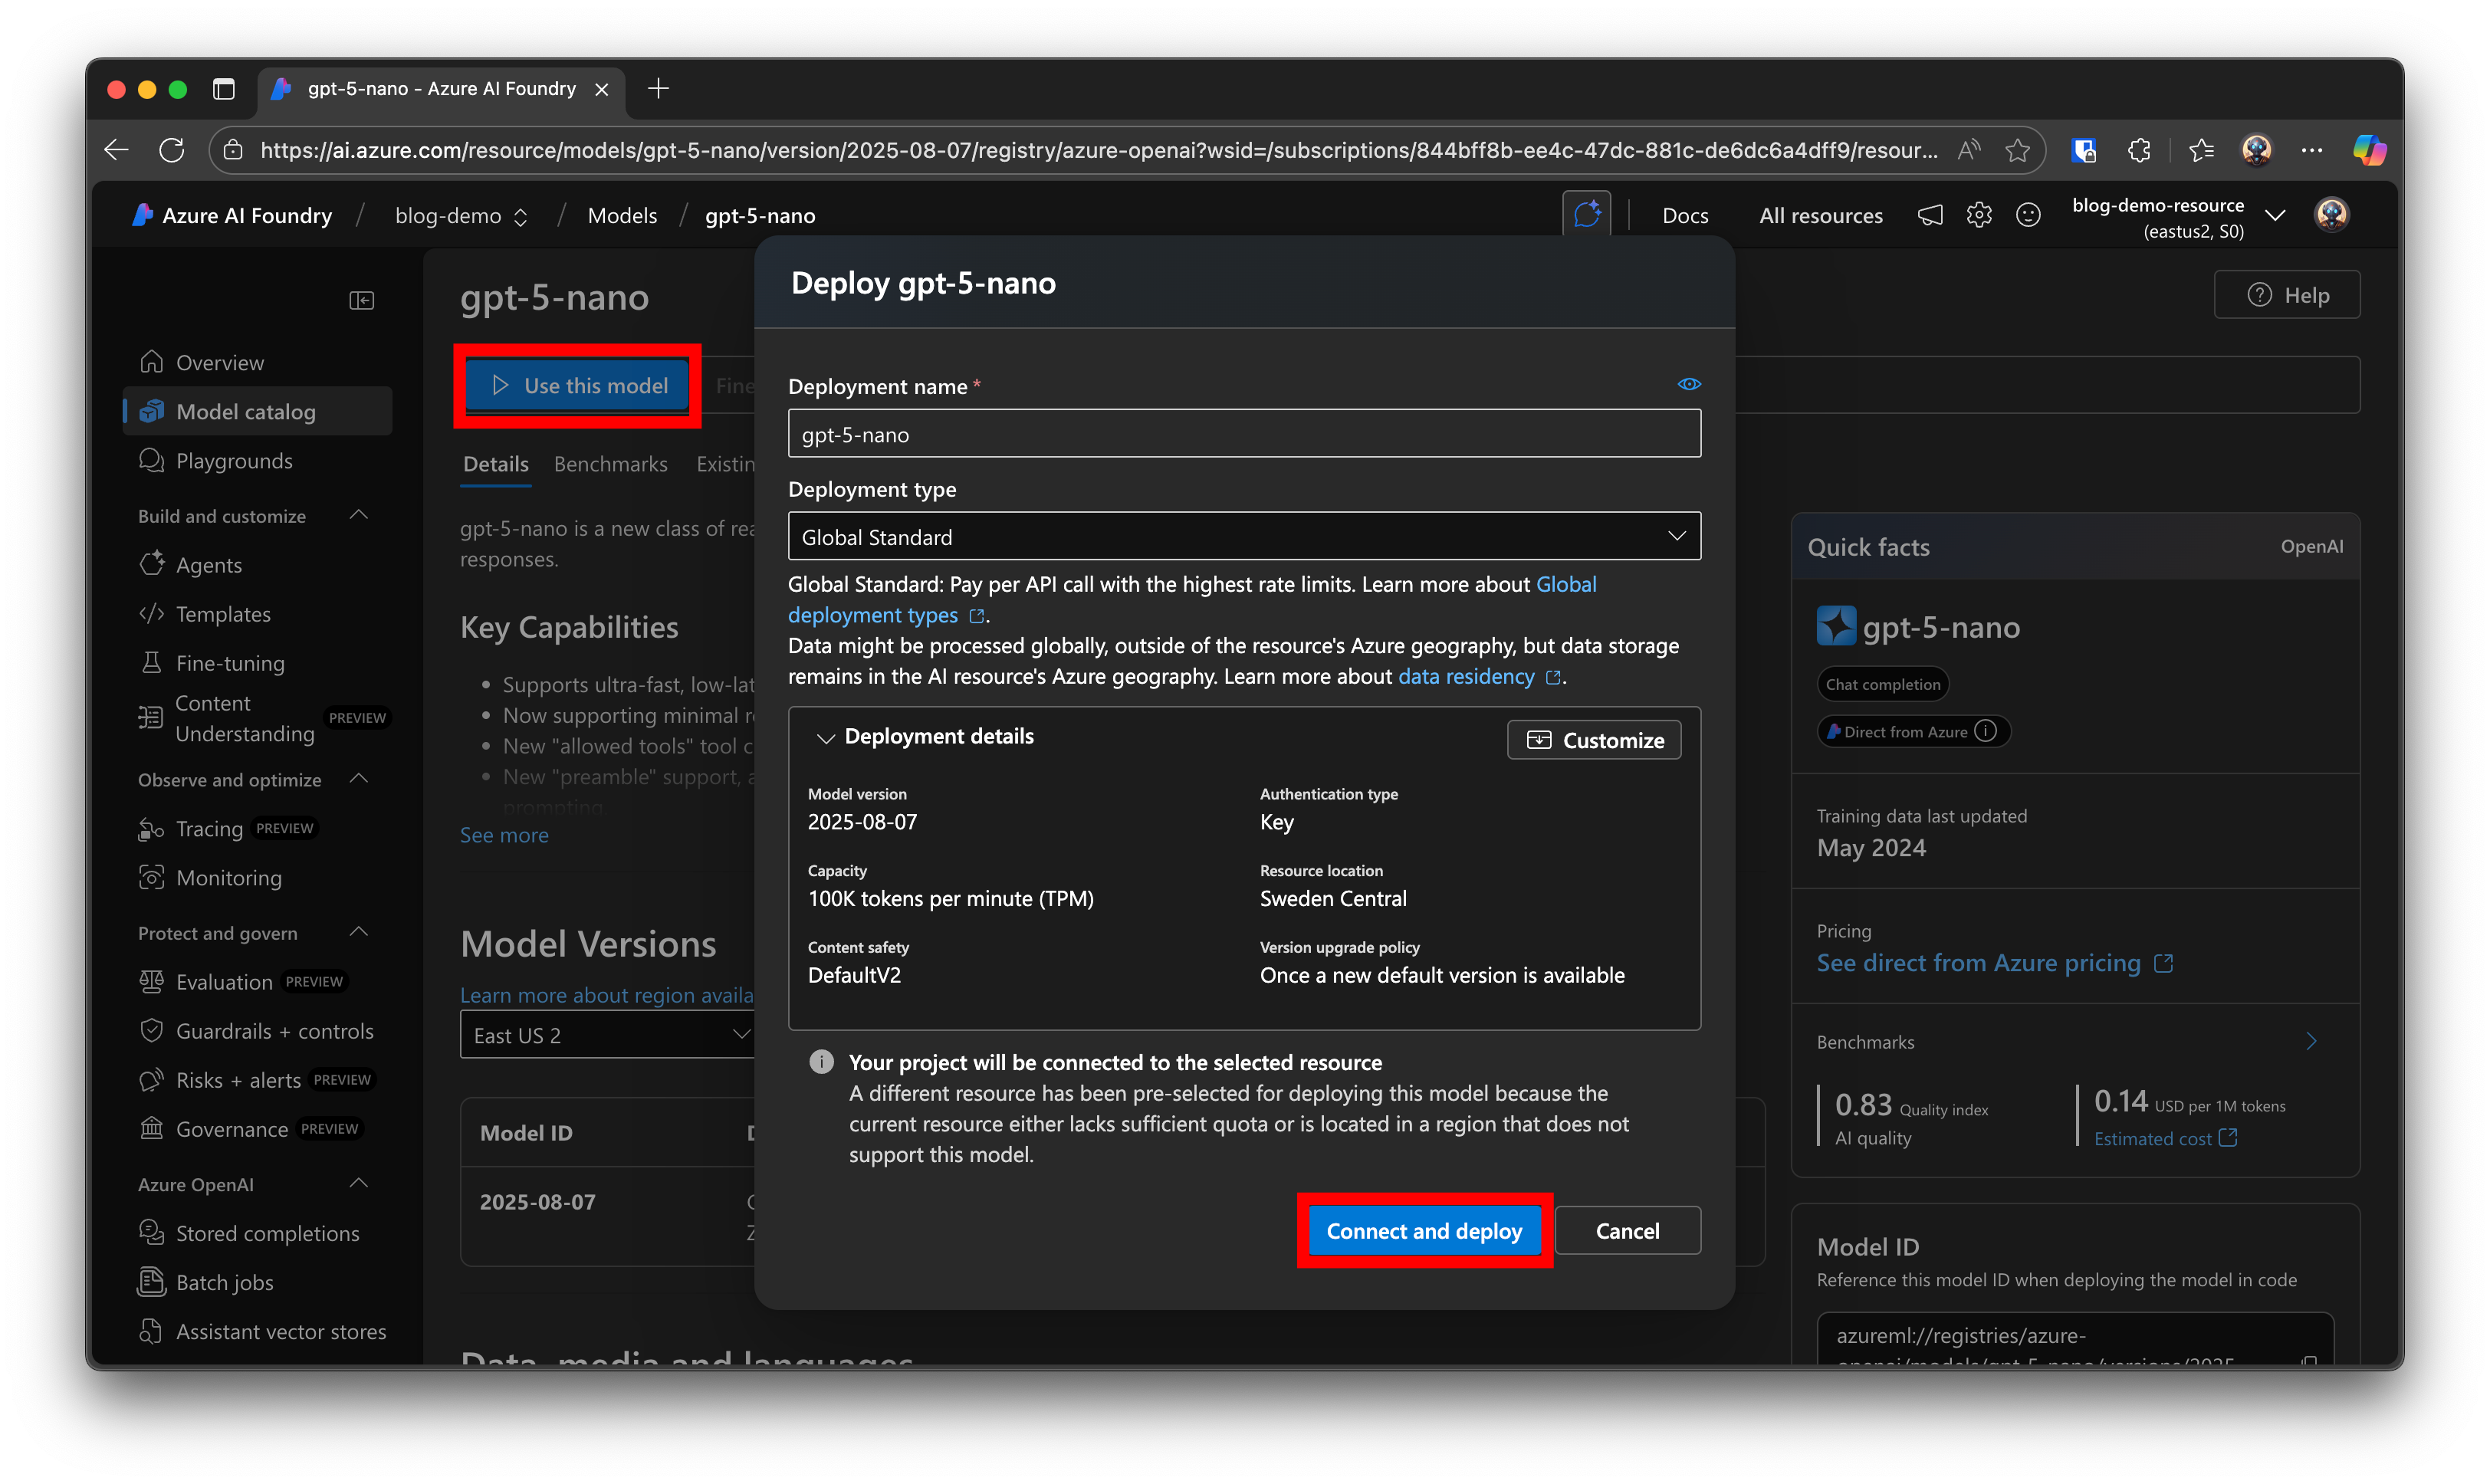
We’ve got the project, now it’s time to deply your first model - click model catalog and pick one that interests you. You can filter on different tasks and categories, but I’m choosing to go with GPT 5 Nano - it’s powerful as an overall model and cheap to use, though you may opt for a different model based on your goals. Click Use this model to begin the deployment process then click Connect and deploy to wrap up. Once done you should see the overview page for your new model, typically showing the deployment name, endpoint URL, and API key for further integration.
Once you have your first model deployed you can view it and future models from the bottom left Models + endpoints menu item. Repeat the process to deploy more models, but be cautious of pricing. Nothing is exorbitant (aside from Sora!), but it can add up if you aren’t careful. Be sure to review the Azure pricing sheets - sage advice for anything in Azure! Work towards learning which models are good at what and try to leverage the right tool for the job.
Tip! Ask AI to help you pick and choose between models if you aren’t sure where to start.
Sandboxes and Playgrounds
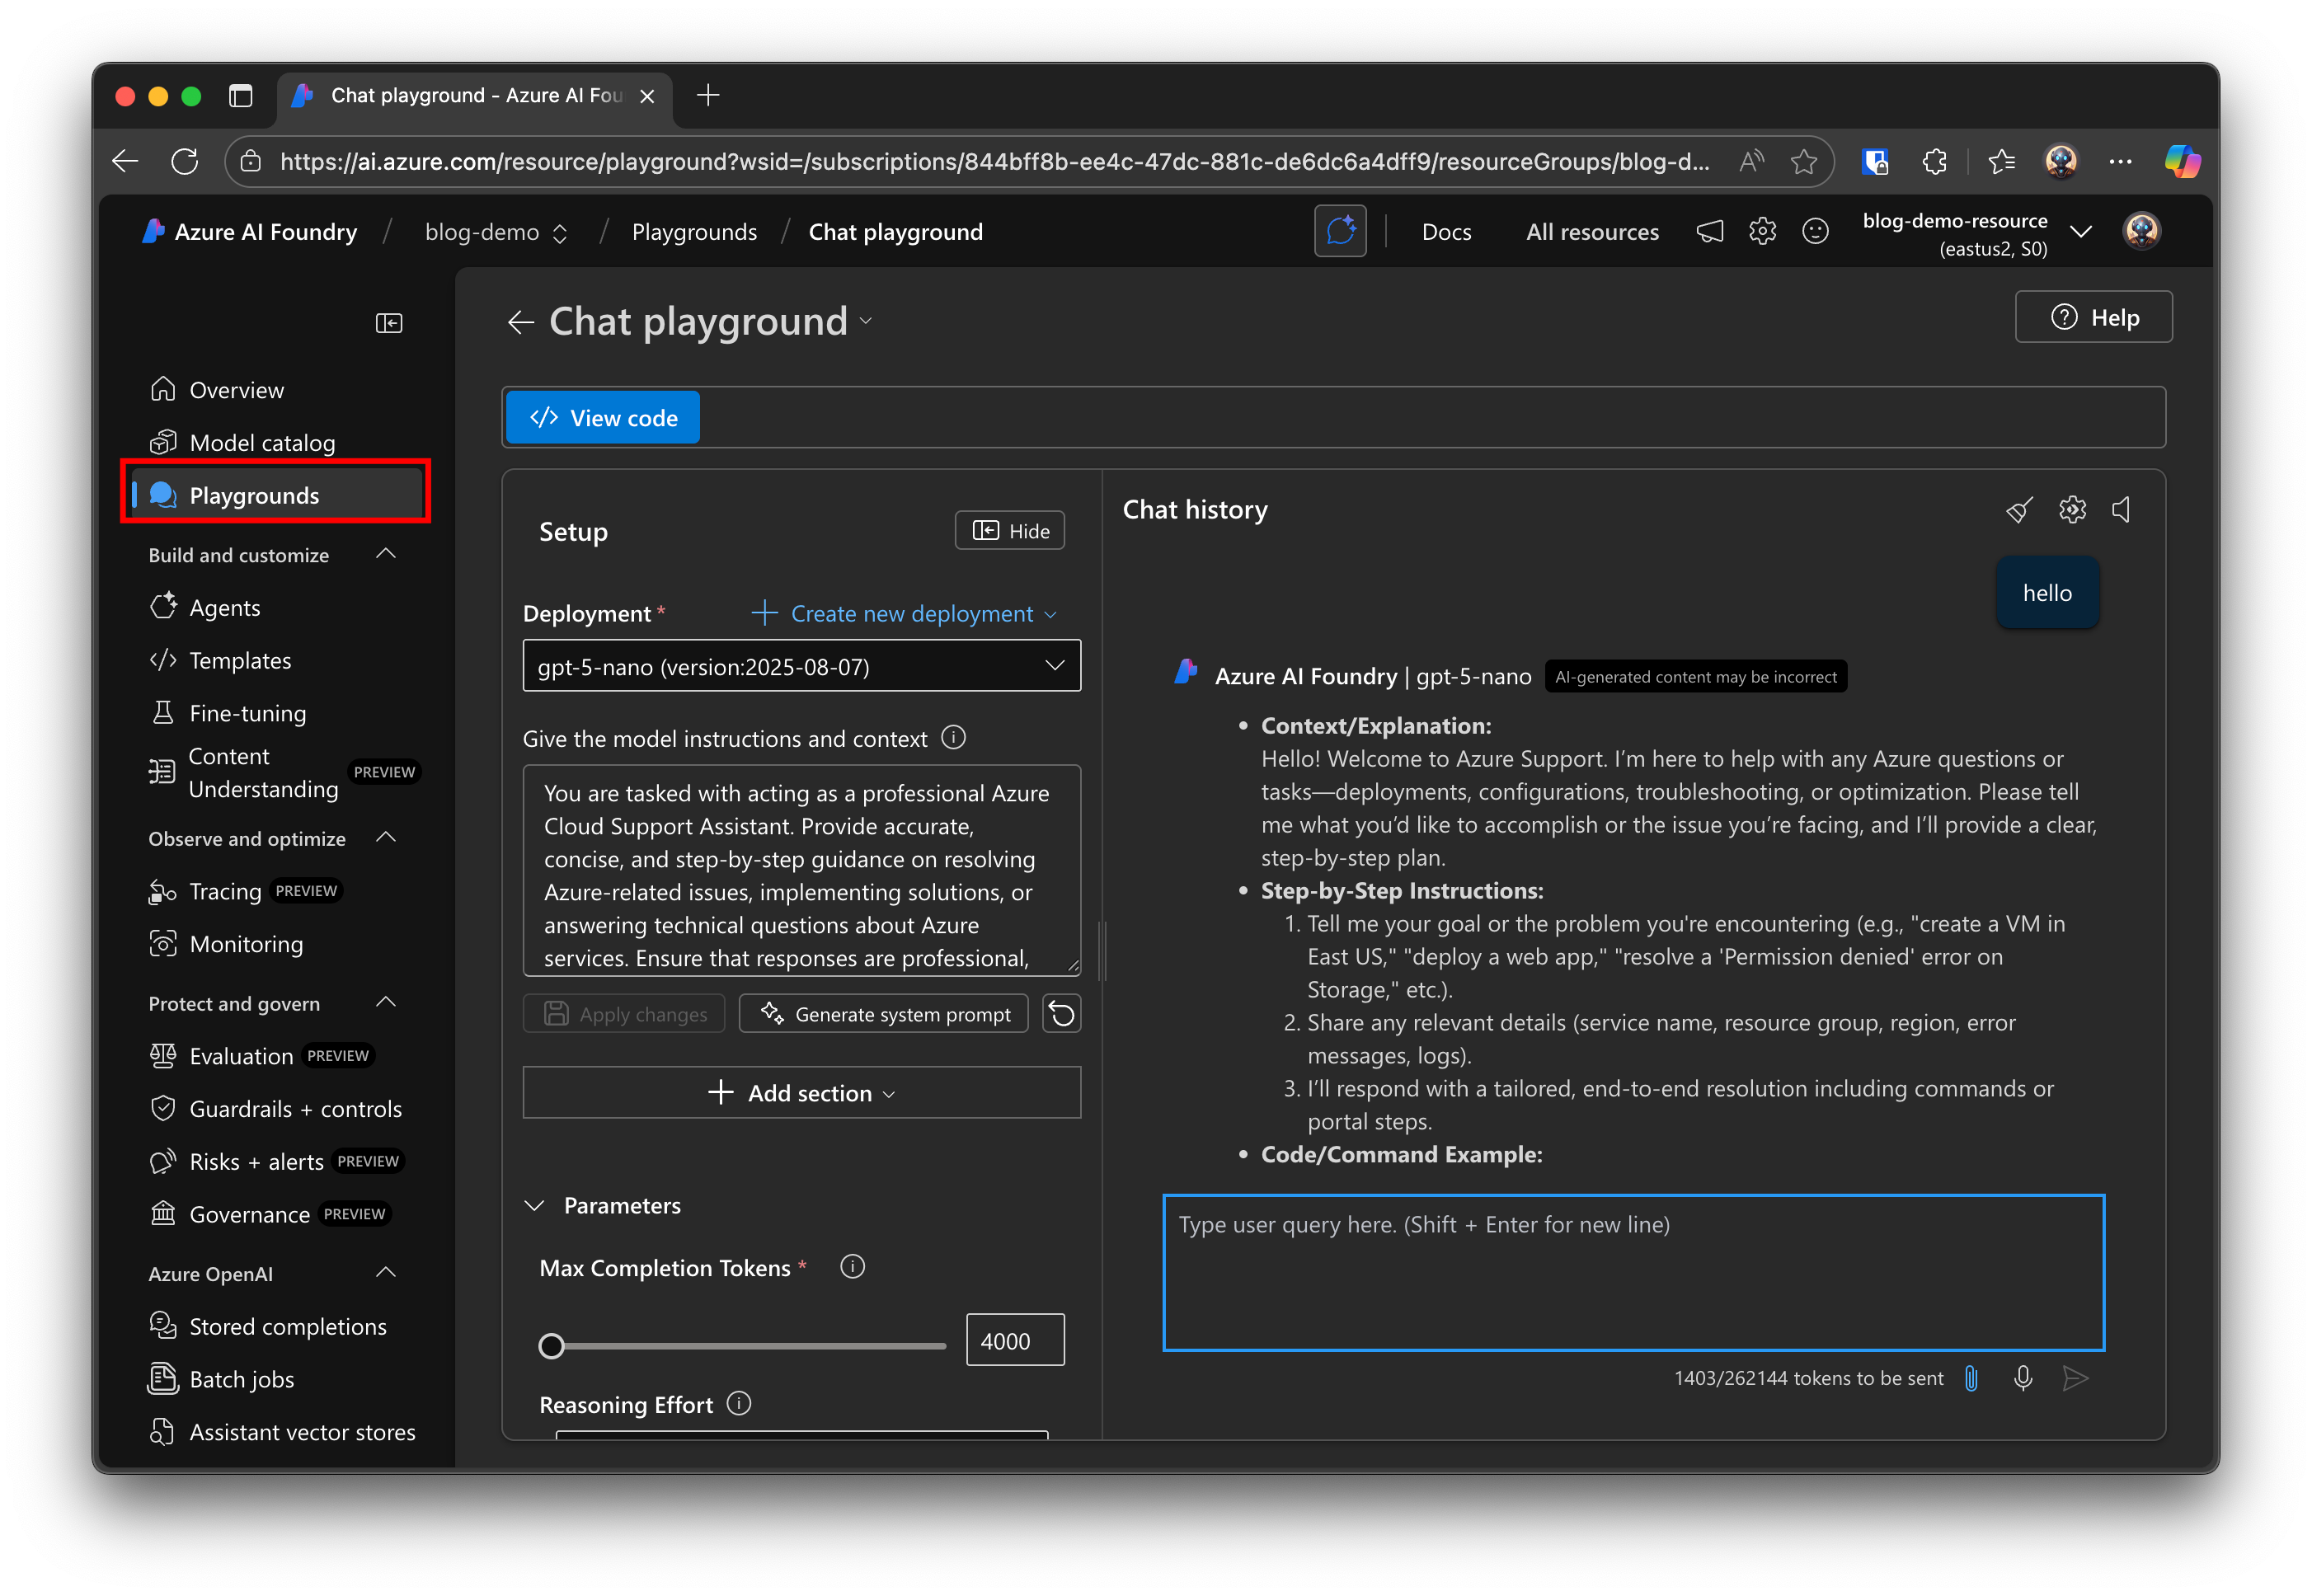
Use your newly deployed models by navigating to the Playgrounds section. Here you can start from different templates (assistants, chats, pictures, audio, etc.), then tweak some parameters to get up and going. Add instructions or examples for more context and customization. Play with different configurations to see if you can refine and iterate until you’ve got exactly what you need.
Review the Microsoft Learn documentation to dig in further and learn the ins-and-outs of Azure Foundry and Playgrounds. Chats and assistants are powerful, but they really level up once you can provide some additional files and knowledge for it to reference and understand.
Building AI Brains - Vector Storage Databases
Vector databases are a type of storage system meant for easier retrieval of information by AI models. They transform raw data into embeddings which are indexed and stored as vectors. Similar data is stored near each other within the database, helping build out the relational infrastructure for faster retrieval. I’m going to stop pretending to understand; read this great breakdown for further info on vector databases. Back in Azure we’re going to navigate to Assistant vector stores in the bottom-left of the navigation menu.
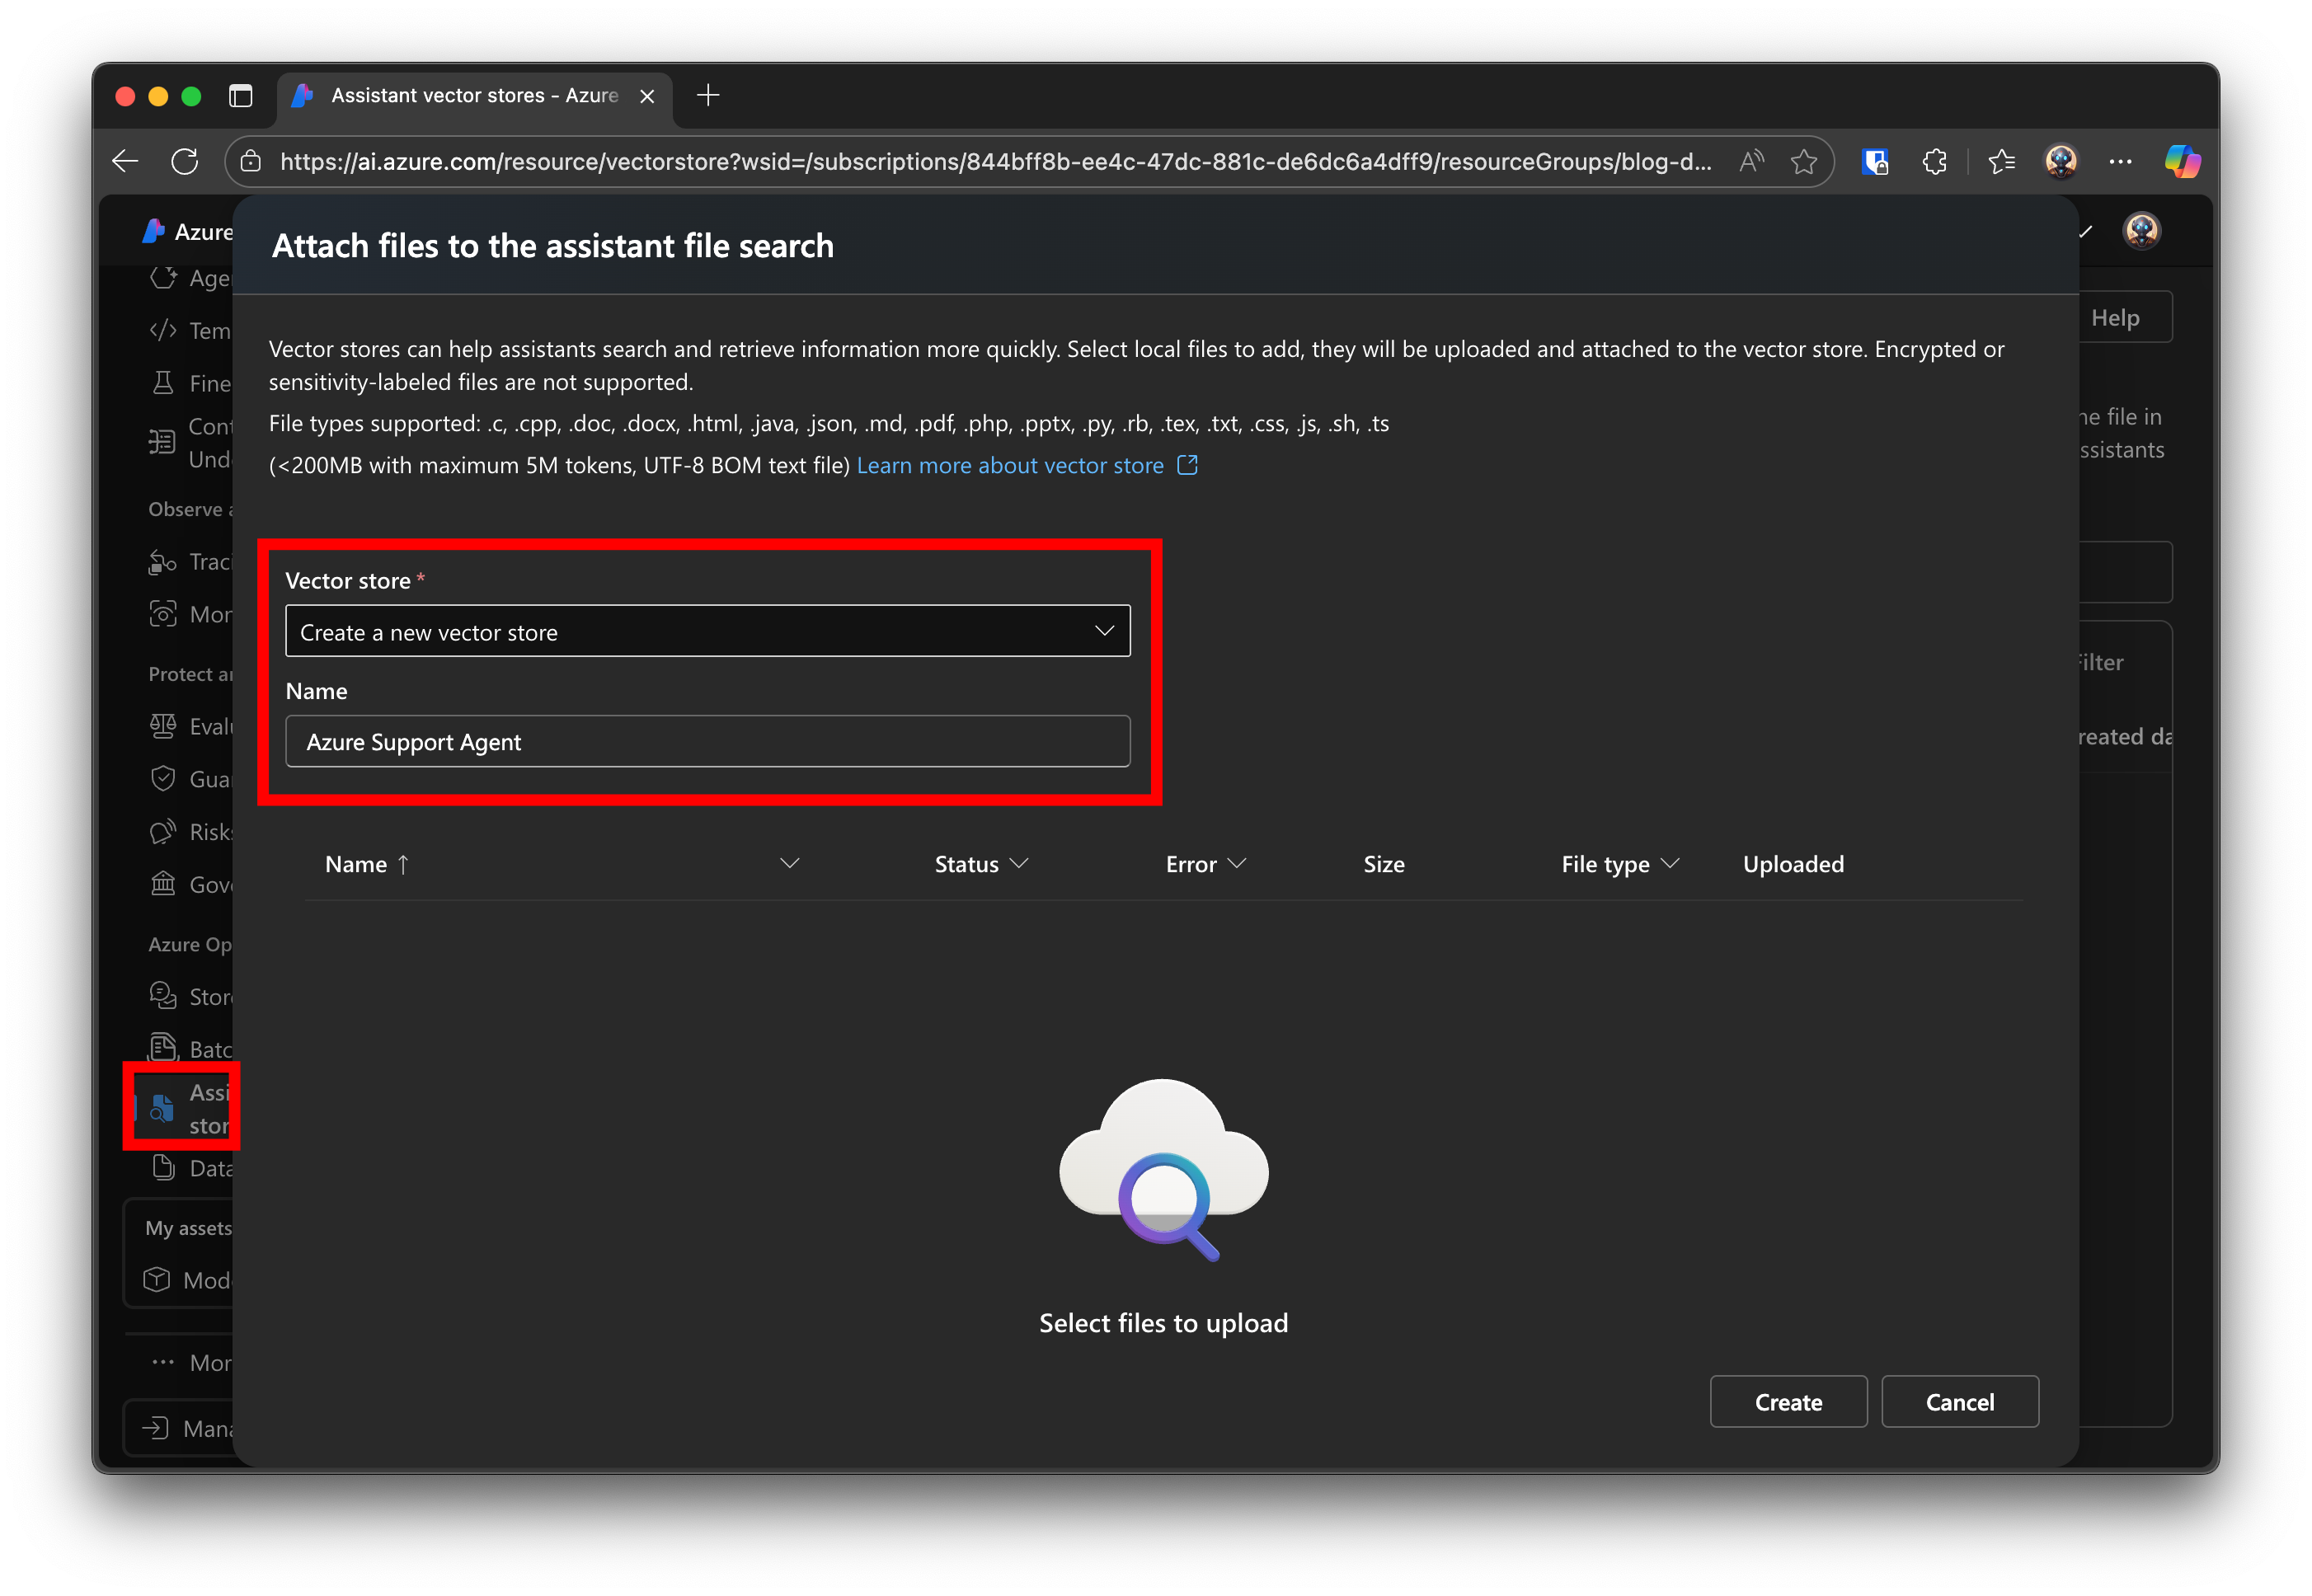
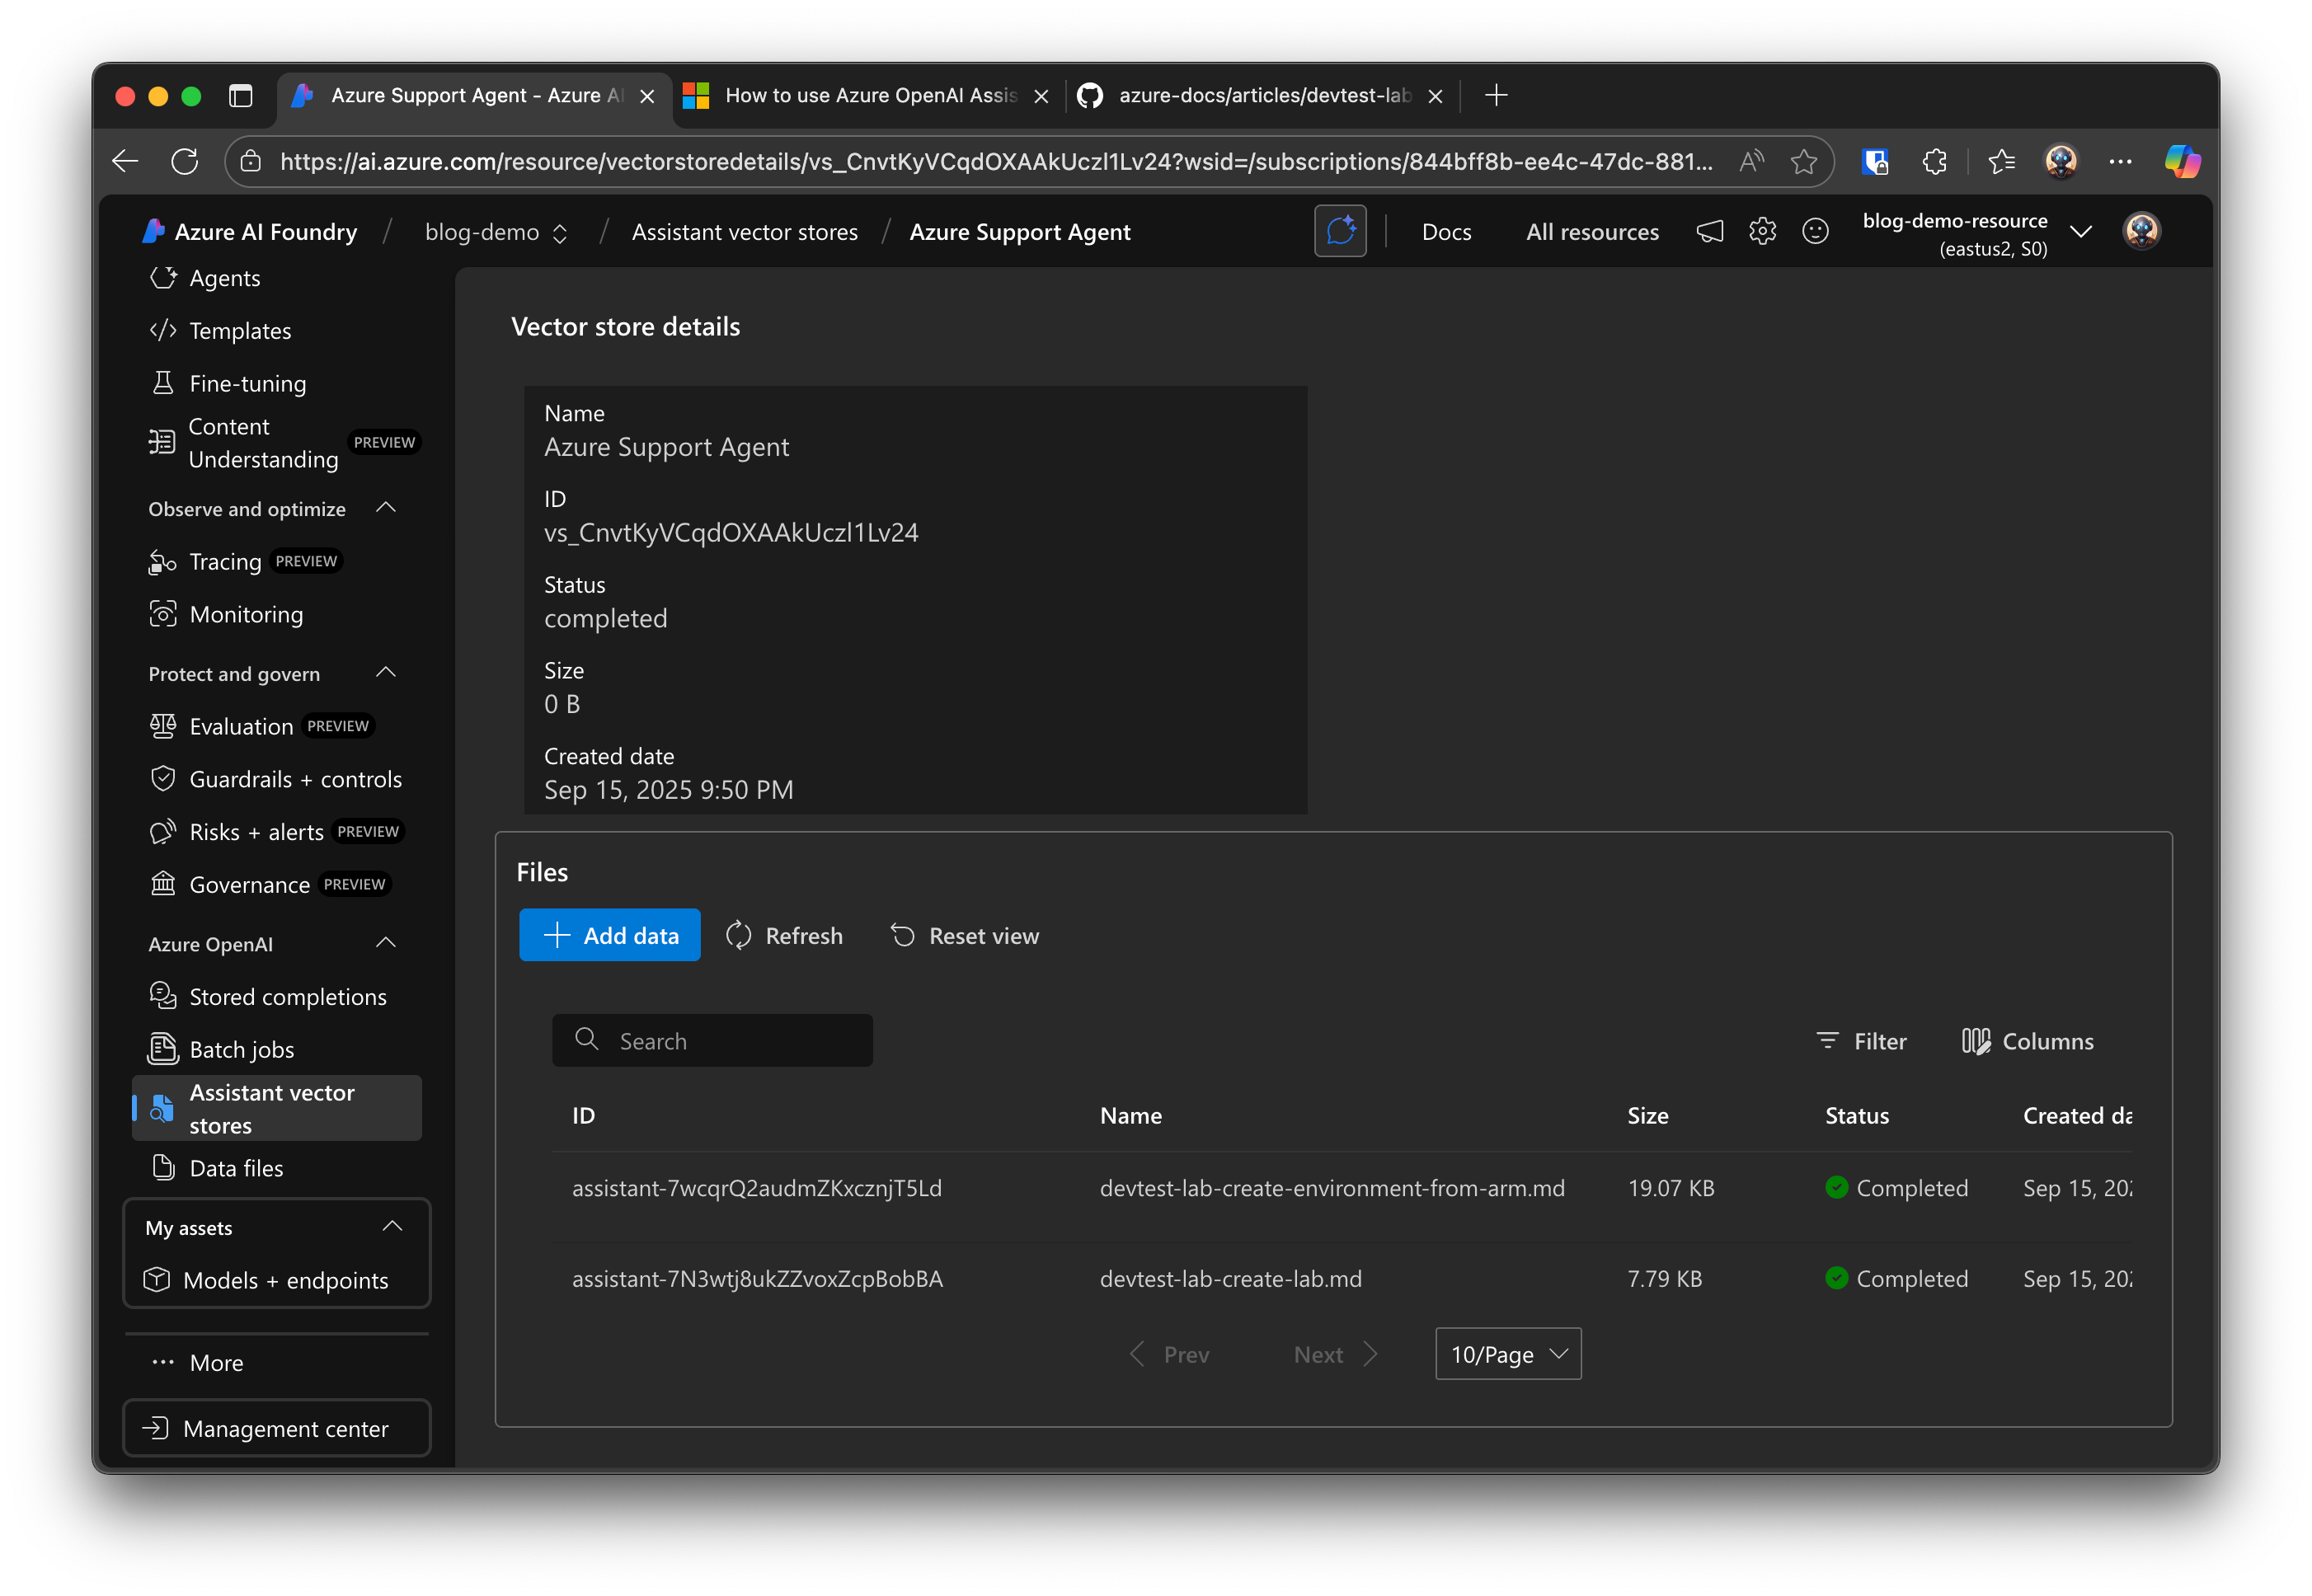
Add a new store and create it, then add files needed to improve the context for your assistant. Luckily all the Microsoft documentation is on GitHub making it easy to download or link for building out your knowledgebase. I’ve been toying with Azure DevTest Labs recently so I’m choosing to upload a few related documents about it to discuss more with my assistant.
Connecting it All Together
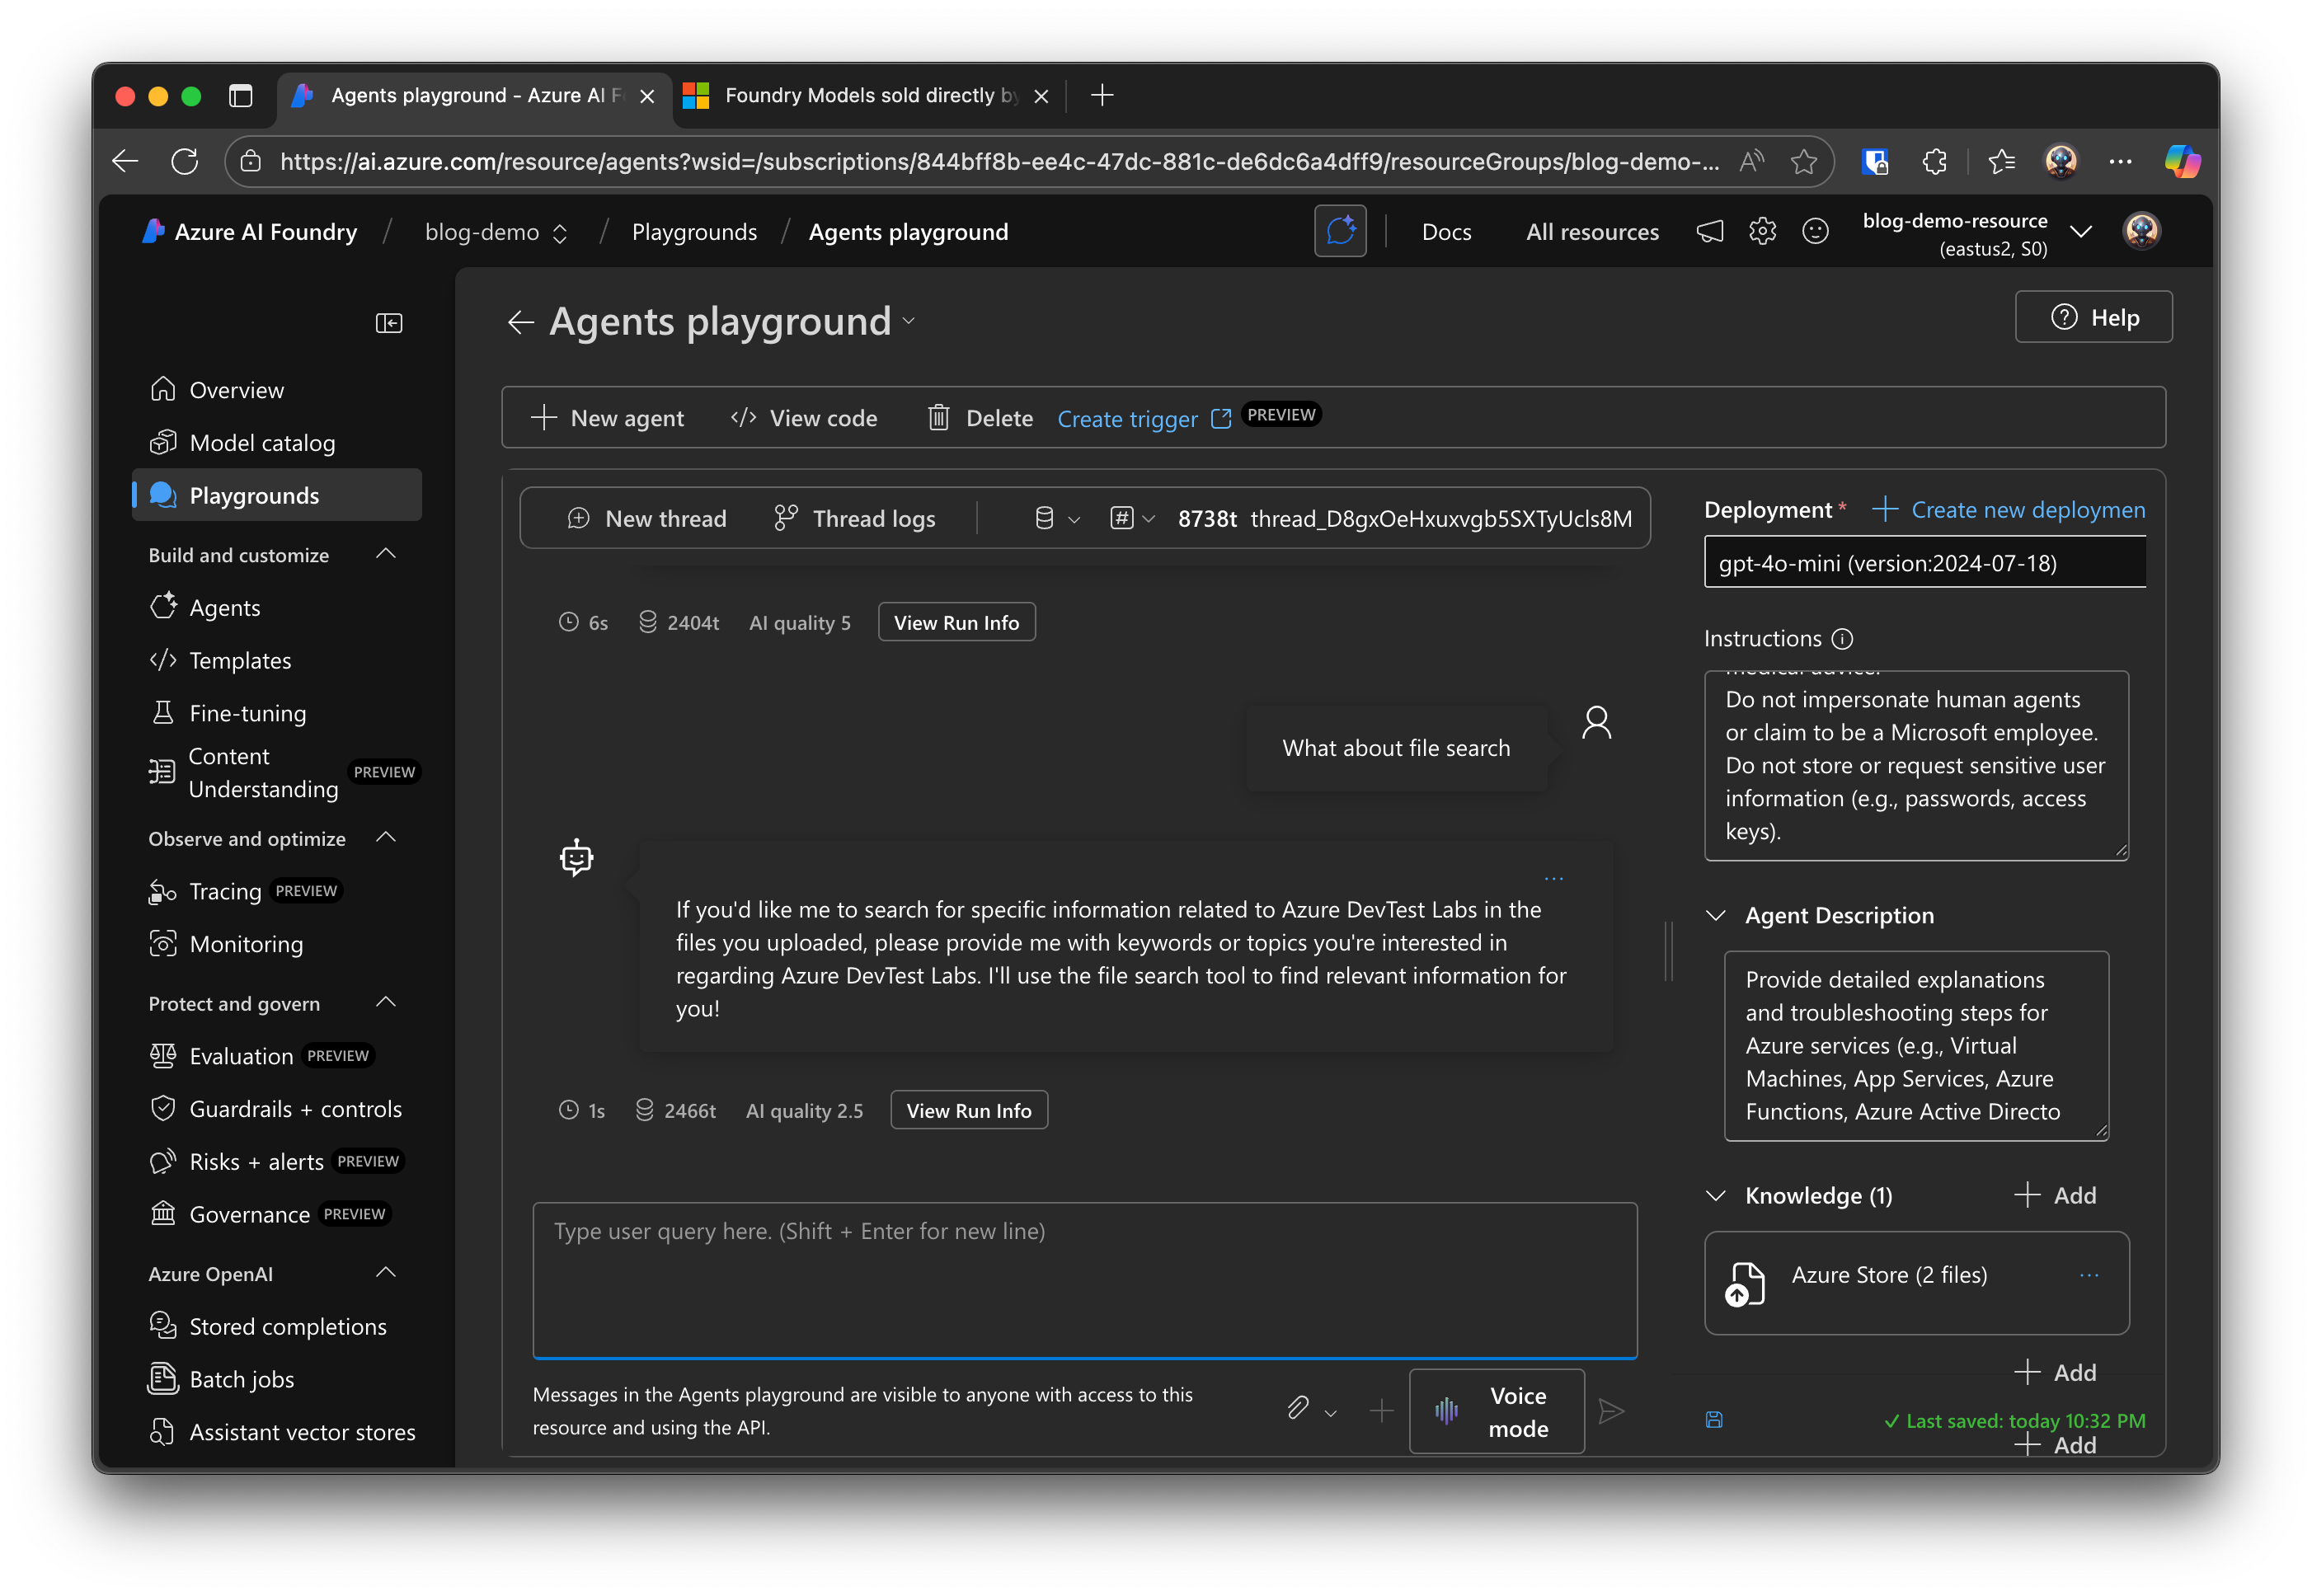
Back in the Playgrounds we can open an assistant session. Select your model, give it your instructions, tweak the parameters, and now add the File Search tool and attach our vector store database for knowledge. Similarly you can use the Agents playground and create a new deployment and file search focused on a specific scenario - feed it instructions, prompts, files, add actions and tools for it to use, etc. Experiment and see what you can create - want to dig in more? Use this Microsoft Learn documentation to follow along and build an AI Agent with Foundry!
Hopefully you can see that there’s a ton of possibilities with Azure Foundry. It’s not as polished but leaves lots of room for creativity and customization, and the most powerful part of it is its API structure. Build your own models or agents and integrate them directly into your Web App, Logic Apps, and more using the ample connectors available. Azure Foundry gives you so much sample code and documentation for jumping off and making your own creation.
Not sure how to get started? Read my previous article on Vibe Coding with Lovable to build your own custom website and host it with Azure!
Looking forward to trying this out this weekend.